This post may contain affiliate links. For more information, please see our affiliate policy.
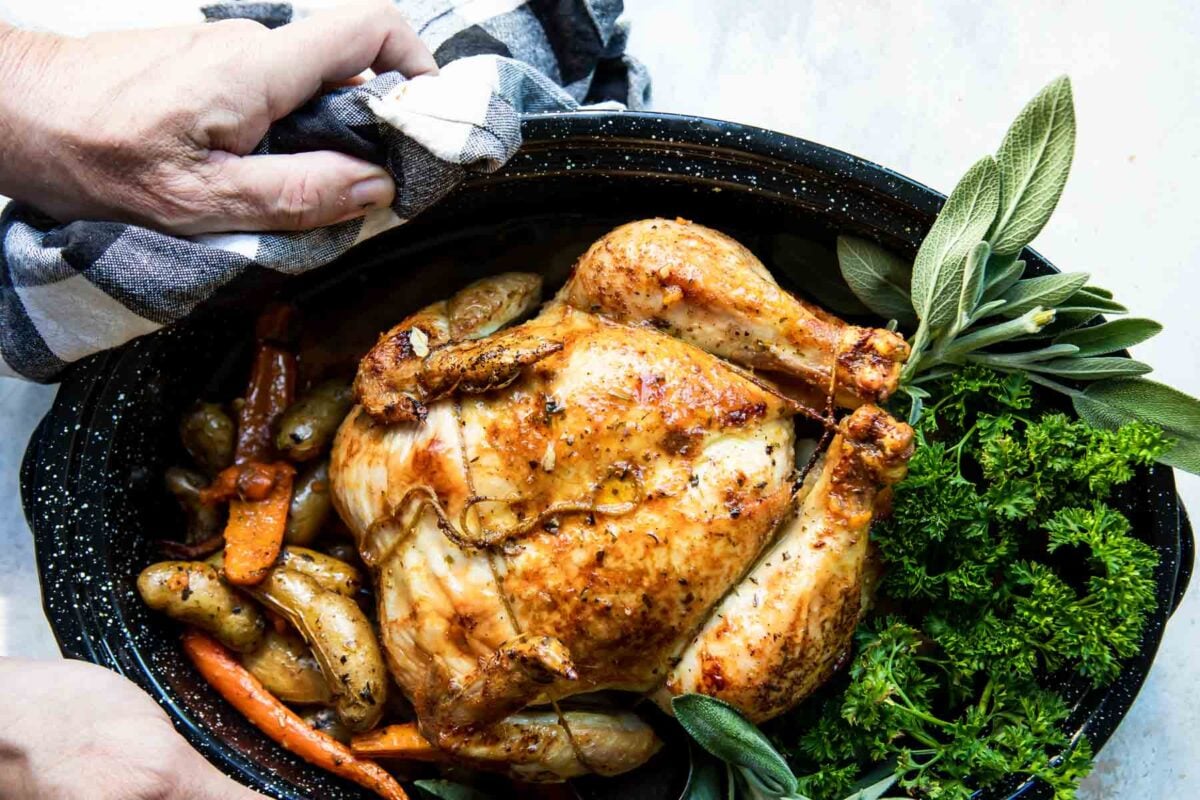
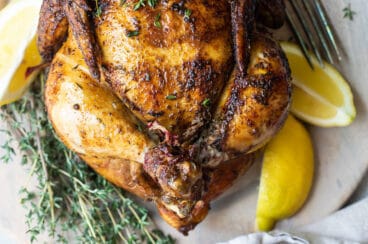
It might seem like an extra step, but learning How to Truss a Chicken before roasting is the key to succulent, evenly-cooked poultry that looks as good as it tastes. Use kitchen twine to tie your bird into a compact bundle for your best roasted chicken yet.
Trussing sounds fussy, but it’s actually a surprisingly simple technique. It means tying poultry (turkey, chicken, capon, or Cornish hen) into a tidy bundle that ensures you’ll get a perfectly roasted bird that’s cooked evenly from end to end, just like the culinary professionals do.
Trussing a chicken makes it much easier to prevents the wings and legs from burning. When you don’t truss your chicken, the breast cavity can stay open allowing too much hot air to circulate inside of it. That dries out the breast meat before the thighs and legs are properly cooked.
I mastered this method for how to truss a chicken while perfecting my Rotisserie Chicken recipe. But you can use this same tying process for any roast poultry recipe you’re whipping up in your kitchen. I like to use a large piece, at least 3 feet of twine, for an average-sized chicken. That way the piece is never too short and I don’t have to worry about cutting a new piece.
For the best roast chicken with juicy white meat and properly cooked thighs and legs, learning how to truss a chicken before roasting is essential. Read on for my complete guide!
Table of Contents
Equipment and ingredient notes
- Twine: Seek out unbleached cotton kitchen twine, also known as butcher’s twine, which is strong enough to hold a chicken together but won’t burn. Brown twine is easier to see on a raw bird than white twine. Most butchers keep this on hand so you can simply ask for a long piece at the counter while you’re ordering your meat. Or, find it locally at HomeGoods or shop online (I buy this twine on Amazon).
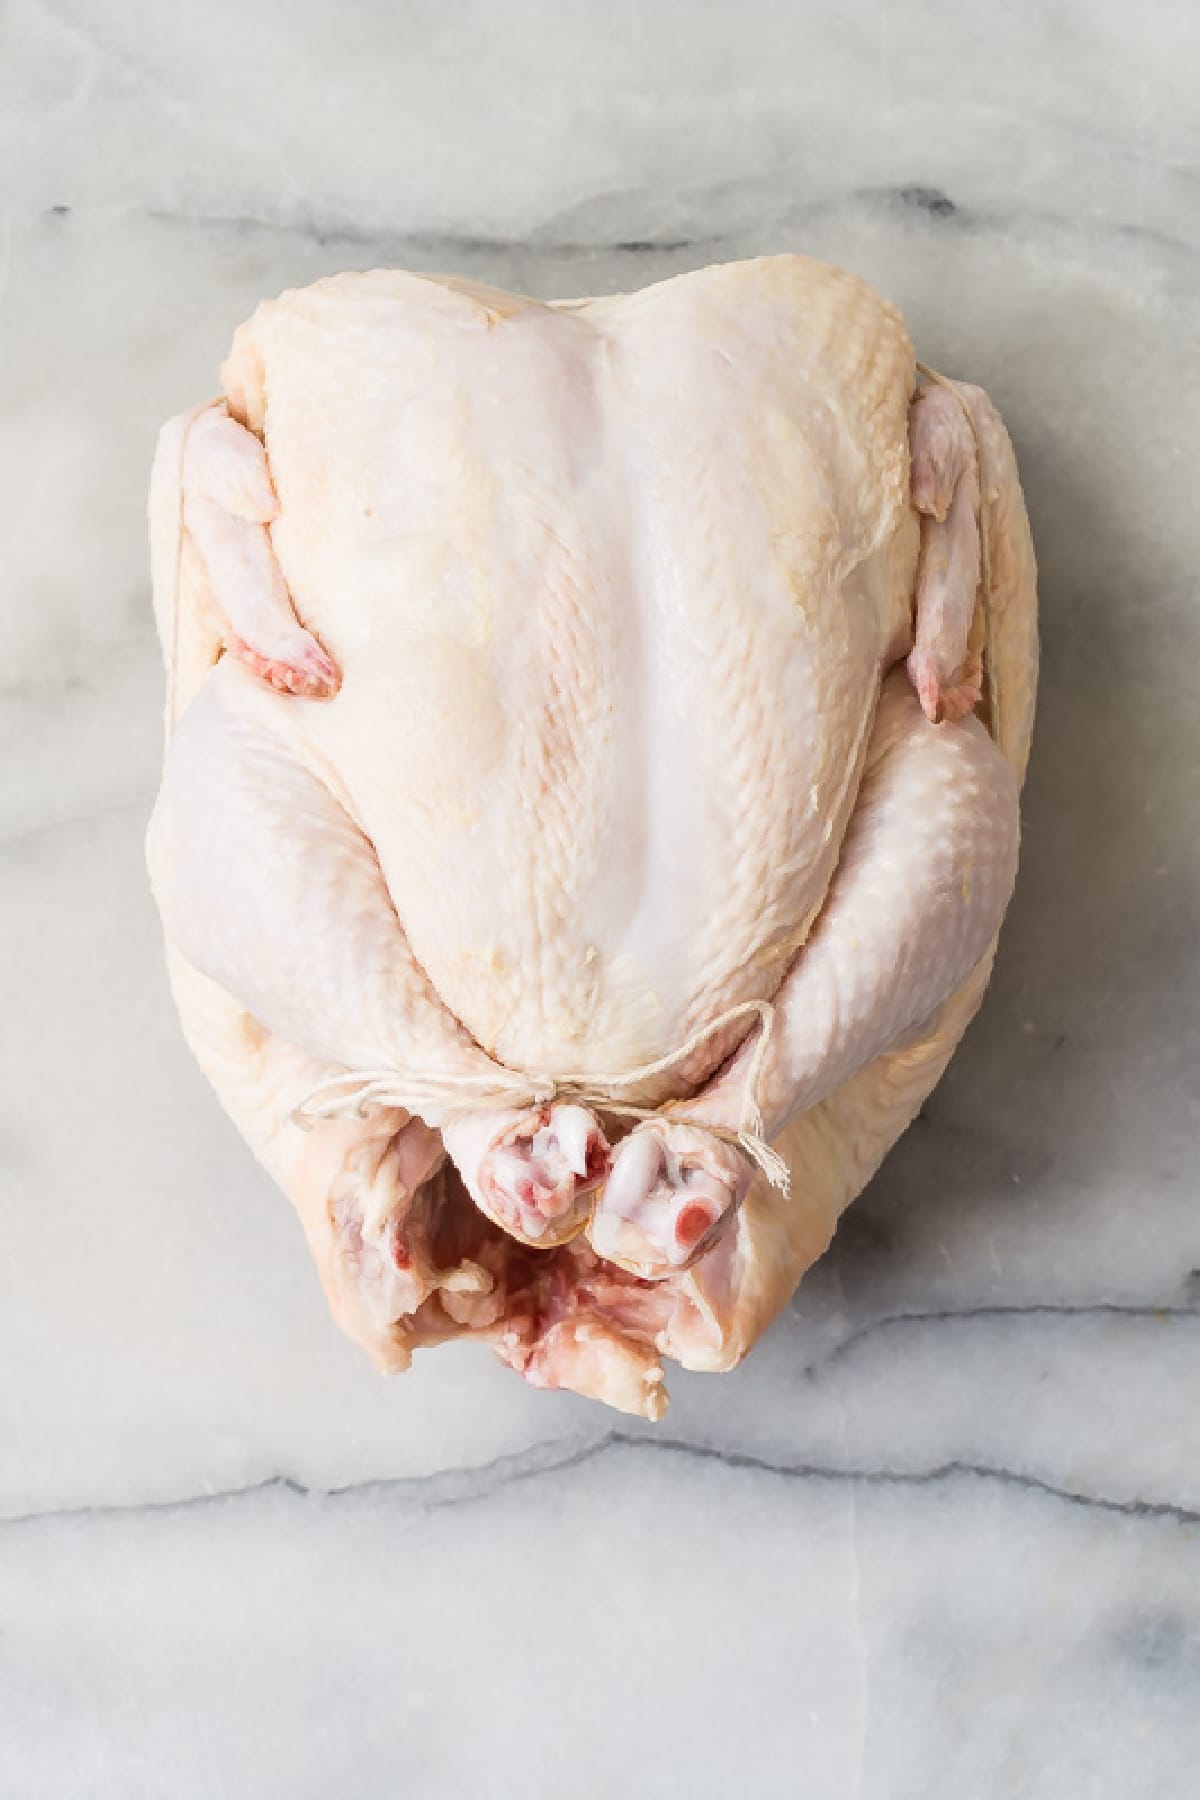
- Chicken: Any kind of bird you like can be trussed. Pre-brined, dry-brined, broilers, fryers, roasters, and natural chickens all benefit from trussing before roasting. Trim any excess skin from the neck area of the chicken before trussing with a sharp knife.
Step-by-step instructions
- Place the chicken breast-side up, and run the center of the string under the neck in the front of the bird. Bring the string up towards the wings and legs. Use your thumbs to tuck the wing tips in as you bring the string around towards the legs. Keep the string tight to force the wings firmly against the body. The string should roughly follow the contours of the chicken breast.
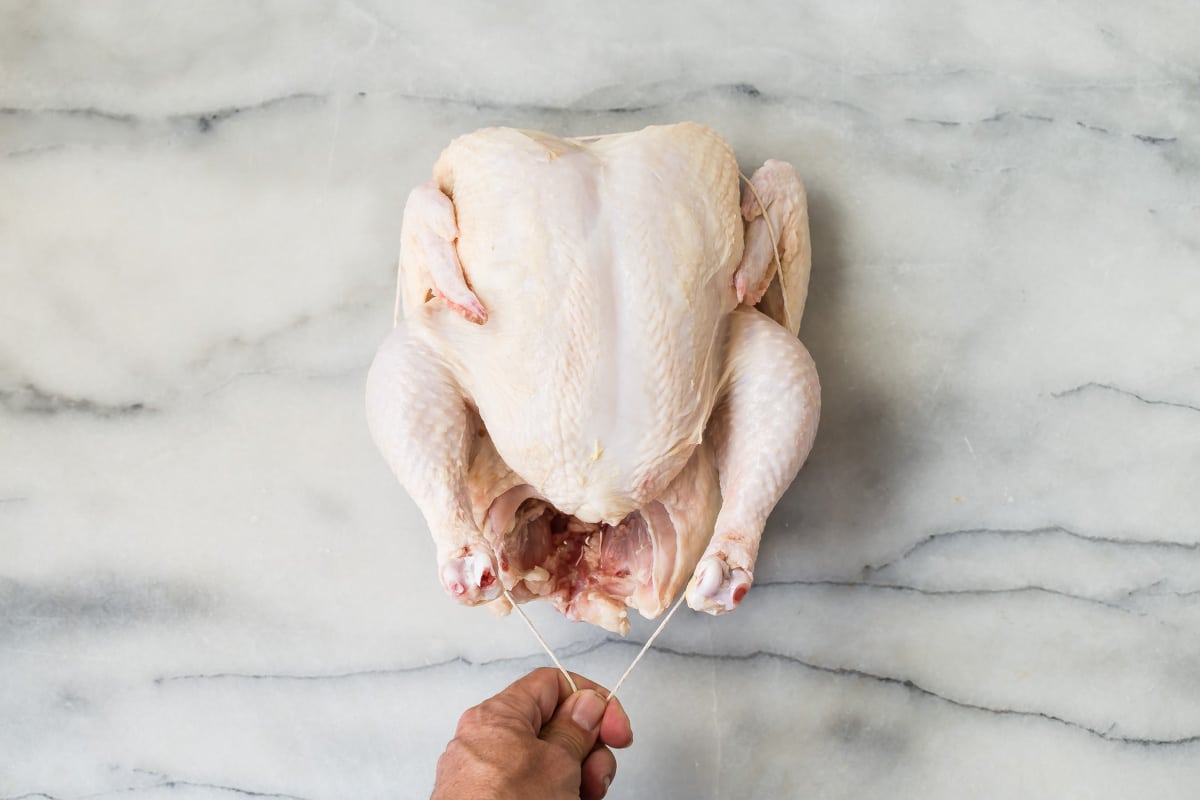
- Bring the string around between leg and breast, then give it one overhand knot and pull tight. The wings will be solidly pinned to the body, and the chicken breast will pop up. Note that this is NOT a solid knot – we just want to be able to tighten up on the string. Bring the ends of string down between the chicken’s legs, then cross the legs at the “ankles” above/behind the point of the chicken breast. Make sure your previous knot is still pulled tight.

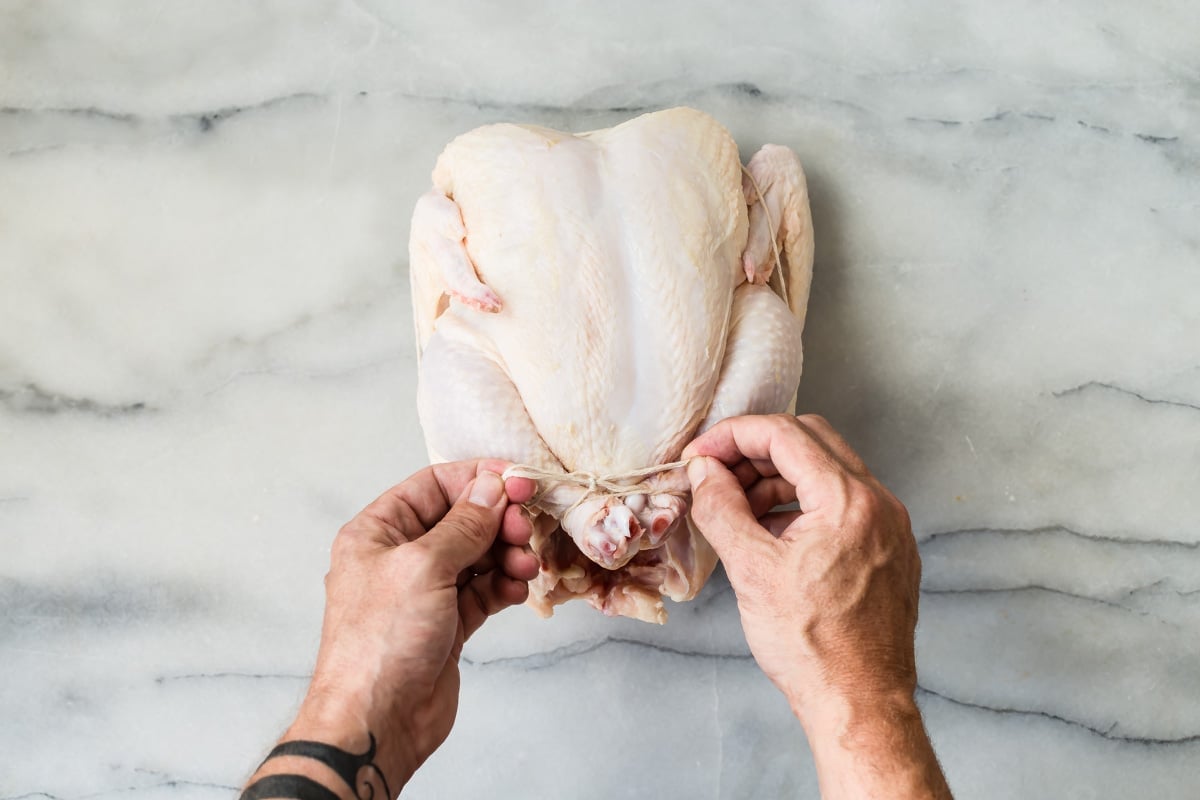
- Separate the strings, loop them around the outside of the chicken ankles, then tie a square knot to finish it off. The legs should now be cinched in close to the body. Trim and discard any excess twine.
Recipe tips and variations
- Yield: 1 whole chicken, weighing about 4 to 5 pounds before roasting, will yield about 3 cups of cooked chicken (2 cups of weight meat and 1 cup of dark meat). These are just guidelines and your results may vary depending on the size and stature of your particular chicken.
- Storage: Store leftover chicken covered in the refrigerator for up to 4 days. Put leftovers to work in Chicken Salad, Chicken Wild Rice Soup, Thai Peanut Chicken, Chicken Tetrazzini, Wisconsin-Style Jambalaya, or Sour Cream Chicken Enchiladas.
- Cavity flavors: Add extra flavor to your roasted chicken by stuffing the cavity with aromatics such as a quartered onion, a halved lemon, diced celery or olives, fresh or dried herbs, and plenty of salt and pepper. Or, add chopped vegetables to the bottom of your roasting pan to infuse your future chicken gravy with extra flavor.
- How to thaw a chicken: If you bought a frozen chicken, make sure it is safely thawed before trussing and roasting. The safest was to thaw a frozen chicken is in the refrigerator (and never at room temperature). Check your refrigerator’s internal temperature; it should be 40 degrees Fahrenheit or colder. Keep the chicken in its original wrapping. Place the chicken on a tray or shallow pan to collect any juices that may leak out as it thaws. Store it at or near the bottom of your refrigerator so if it leaks, it won’t contaminate anything under it. Allow 24 hours for every 4 to 5 pounds of frozen chicken.
- Rotisserie Chicken: If you have a rotisserie spit, or you just love the flavor and want to replicate it in the oven, be sure to check out my popular recipe on How to Make Rotisserie Chicken. If you’re looking for a rotisserie oven, I rounded up my favorites that you can read about in The Best Rotisserie Ovens.
Frequently Asked Questions
Many cooks use unflavored dental floss to truss their chickens and turkeys and this is a solid substitute. Feel free to use floss.
Try my stringless trussing technique, which uses the loose skin of the chicken to hold the legs in place. Place the chicken with the cavity facing you. You should see two skin flaps on either side of the cavity, near the legs. With a sharp paring knife, cut a small slit in the center of each flap, going through the skin. Use your finger if necessary to widen the hole. Your finger should just be able to fit in each slit. Carefully tuck the end of each drumstick into the slit on the opposite side of the leg. When you’re finished, the legs will cross over each other and stay tight against the body of the bird. Next, grab the wing by the tip, gently twisting it away from you, and fold the tips of the wings behind the back. The weight of the bird holds them in place while everything cooks.
For food safety reasons, and for a more evenly cooked bird, most modern recipes don’t encourage stuffing turkeys and chickens. If you decide to stuff your poultry, make sure the stuffing is warm when it goes in so it has a head start in cooking (either because you just finished making it, or because you made it in advance and reheated it). Use a large spoon or your hands to loosely stuff the body and neck cavities (do not pack it tightly because the stuffing expands while it cooks). Truss the main cavity with trussing pins to keep the stuffing inside. The stuffing must register 165 degrees on an internal thermometer to be safe to eat.
Birds for roasting
Thanksgiving Recipes
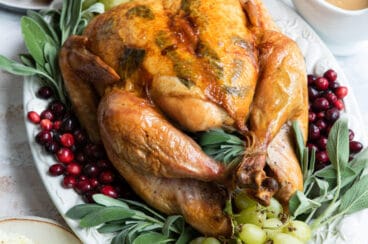
Perfect Roast Turkey
Chicken and Turkey Recipes
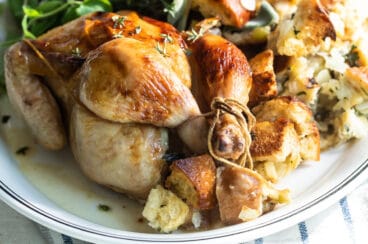
Cornish Hens with Stuffing
Chicken and Turkey Recipes
How to Make Rotisserie Chicken

Chicken and Turkey Recipes
Garlic Butter Roast Chicken
Join Us

How to Truss a Chicken
Equipment
- 3 feet kitchen twine (see note 1)
Ingredients
- 1 4 to 5 pound whole chicken (see note 2)
Instructions
- Cut a length of kitchen twine to about 3 feet in length. Place the chicken breast-side up, and run the center of the string under the neck in the front of the bird. Bring the string up towards the wings and legs.
- Use your thumbs to tuck the wings in as you bring the string around towards the legs. Keep the string tight to force the wings firmly against the body. The string should roughly follow the contours of the chicken breast.
- Bring the string around between leg and breast, then give it one overhand knot and pull tight. The wings will be solidly pinned to the body, and the chicken breast will pop up. Note that this is NOT a solid knot – we just want to be able to tighten up on the string.
- Bring the ends of string down between the chicken’s legs, then cross the legs at the “ankles” above/behind the point of the chicken breast. Make sure your previous knot is still pulled tight.
- Separate the strings, loop them around the outside of the chicken ankles, then tie a square knot to finish it off. The legs should now be cinched in close to the body. Snip the extra ends of string, and discard them.
Recipe Video
Notes
- Twine: Seek out unbleached cotton kitchen twine, also known as butcher’s twine, which is strong enough to hold a chicken together but won’t burn. Brown twine is easier to see on a raw bird than white twine. Most butchers keep this on hand so you can simply ask for a long piece at the counter while you’re ordering your meat. Or, find it locally at HomeGoods or shop online (I buy this twine on Amazon).
- Chicken: Any kind of bird you like can be trussed. Pre-brined, dry-brined, broilers, fryers, roasters, and natural chickens all benefit from trussing before roasting. Trim any excess skin from the neck area of the chicken before trussing with a sharp knife.
- Yield: 1 whole chicken, weighing about 4 to 5 pounds before roasting, will yield about 3 cups of cooked chicken (2 cups of weight meat and 1 cup of dark meat). These are just guidelines and your results may vary depending on the size and stature of your particular chicken.
- Storage: Store leftover chicken covered in the refrigerator for up to 4 days
Nutrition
Meggan Hill is a classically-trained chef and professional writer. Her meticulously-tested recipes and detailed tutorials bring confidence and success to home cooks everywhere. Meggan has been featured on NPR, HuffPost, FoxNews, LA Times, and more.