This post may contain affiliate links. For more information, please see our affiliate policy.
Trussing a turkey before roasting it keeps the legs and wings close to the body so everything cooks evenly. It’s a simple method if you have some kitchen twine and a little know-how.
The act of trussing closes the turkey breast cavity which prevents the breast from drying out before the thighs and legs are properly cooked. It’s actually super simple, and one of the most important things you can do to get a juicy, well-cooked bird.
Table of Contents
Trussing notes
- Twine: Unbleached cotton kitchen twine, also known as butcher’s twine, is strong enough to hold a turkey together but won’t burn. Pro tip: You can ask your butcher for a long piece so you’ll always have some on hand. Sometimes I find it at HomeGoods or I buy this twine on Amazon (Culinary Hill may earn money if you buy through this link).
- Turkey: Any kind of bird you like: pre-brined, dry-brined, Kosher, heritage, or natural turkeys all benefit from trussing.
- Stringless trussing method: This technique uses the loose skin of the turkey to hold the legs in place.
- Place the turkey with the cavity facing you. You should see two skin flaps on either side of the cavity, near the legs.
- With a sharp paring knife, cut a small slit in the center of each flap, going through the skin. Use your finger if necessary to widen the hole. Your finger should just be able to fit in each slit.
- Carefully tuck the end of each drumstick into the slit on the opposite side of the leg. When you’re finished, the legs will cross over each other and stay tight against the body of the bird.
- Next, grab the wing by the tip, gently twisting it away from you, and fold the tips of the wings behind the back. The weight of the bird holds them in place while everything cooks.
Step-by-step instructions
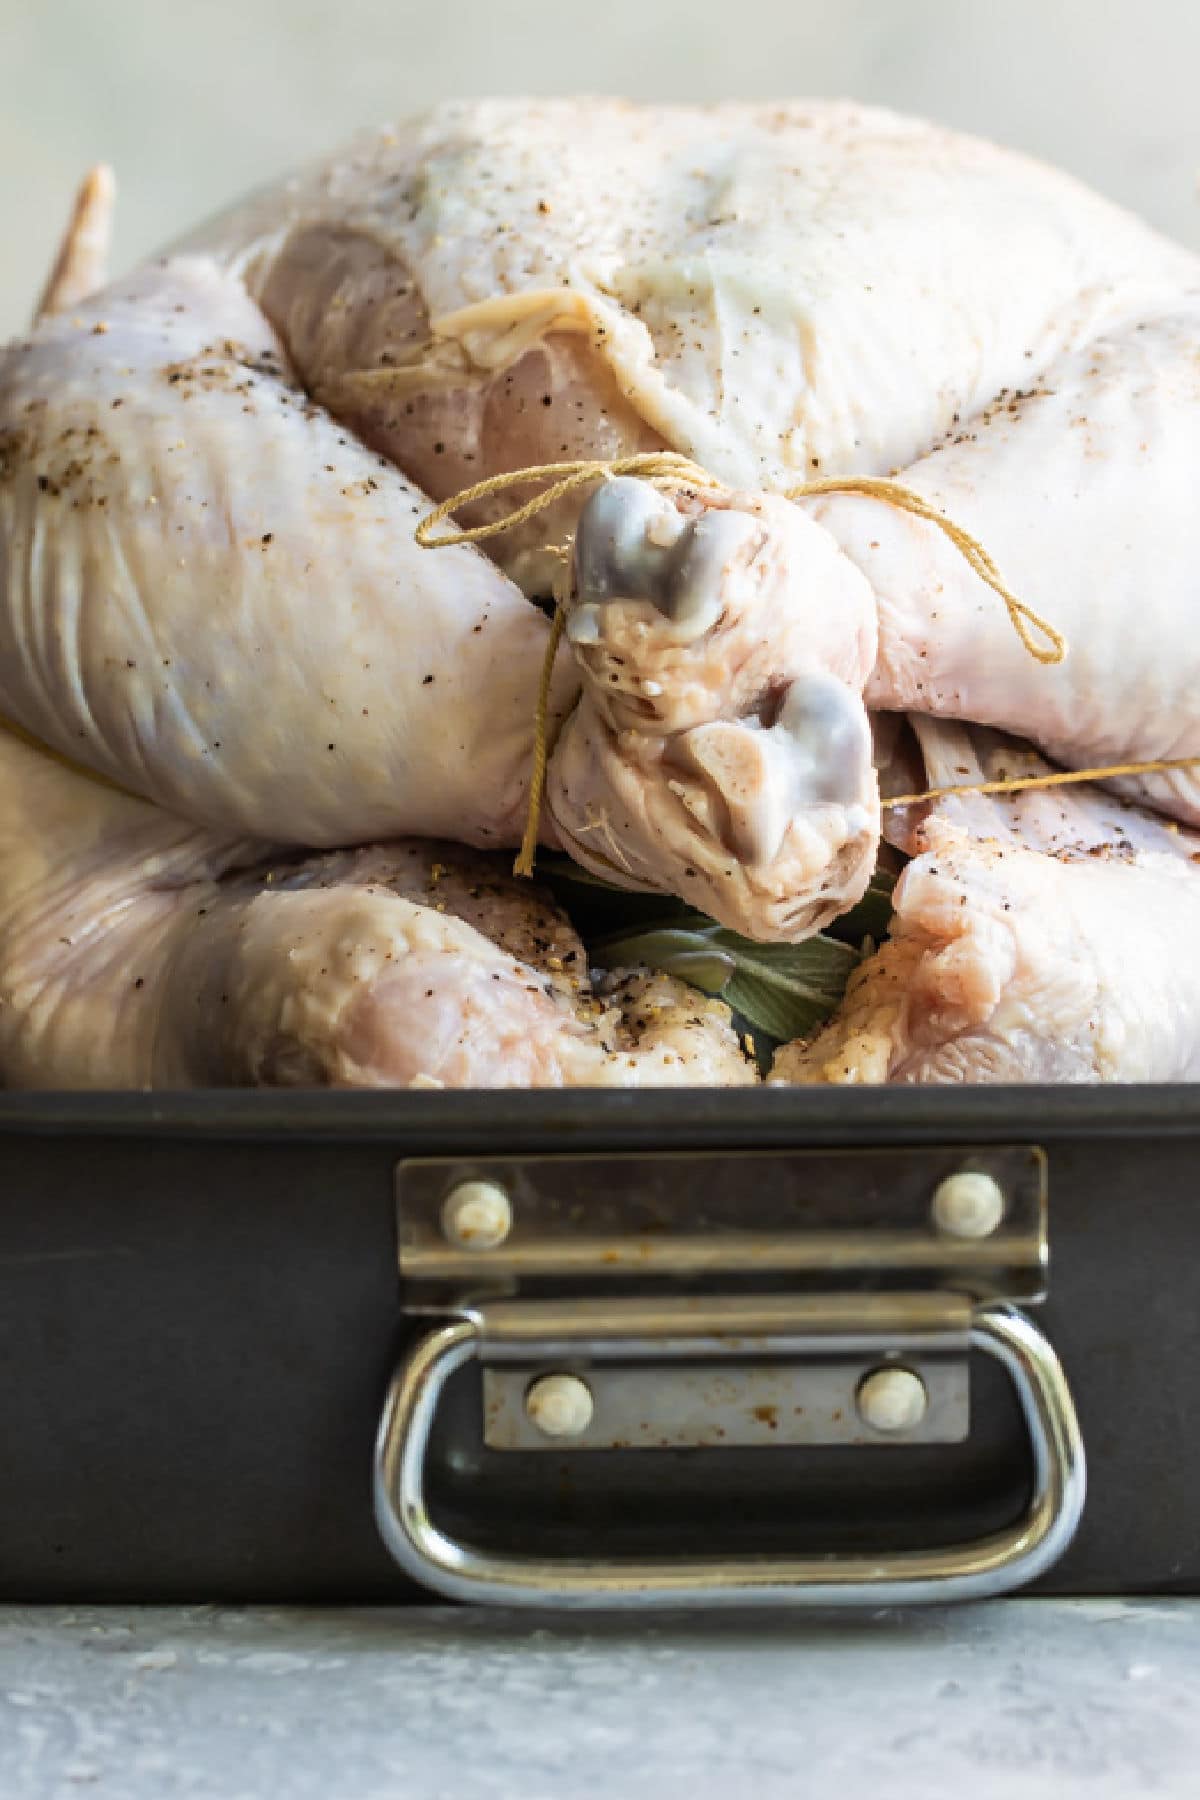
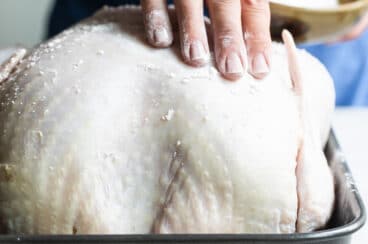
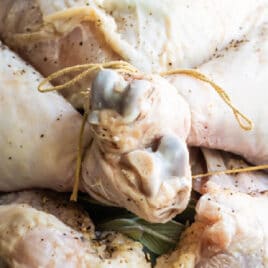
- Place the thawed (and brined, if applicable) turkey breast-side up, and run the center of the string under the neck in the front of the bird. Bring the string up towards the wings and legs. Use your thumbs to tuck the wings in as you bring the string around towards the legs. Keep the string tight to force the wings firmly against the body. The string should roughly follow the contours of the turkey breast.
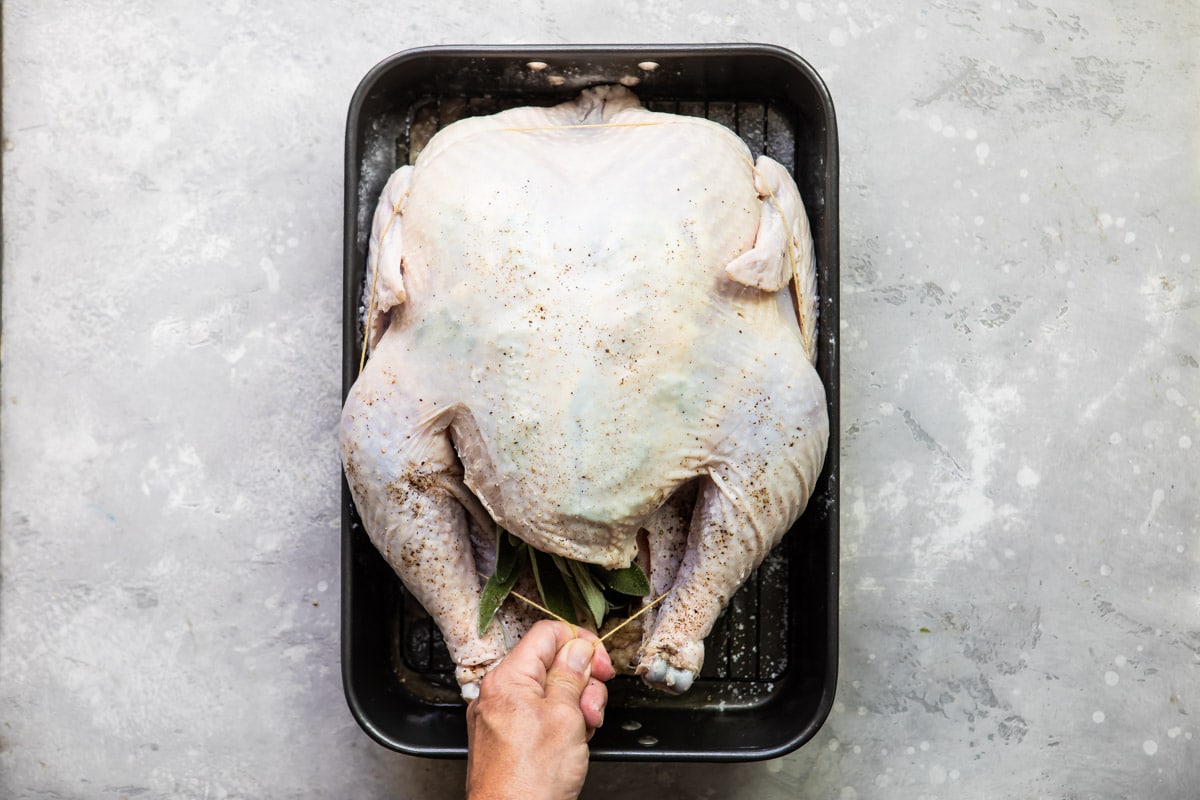
- Bring the string around between leg and breast, then give it one overhand knot and pull tight. The wings will be solidly pinned to the body, and the turkey breast will pop up. Note that this is NOT a solid knot – we just want to be able to tighten up on the string. Bring the ends of string down between the turkey’s legs, then cross the legs at the “ankles” above/behind the point of the turkey breast. Make sure your previous knot is still pulled tight.
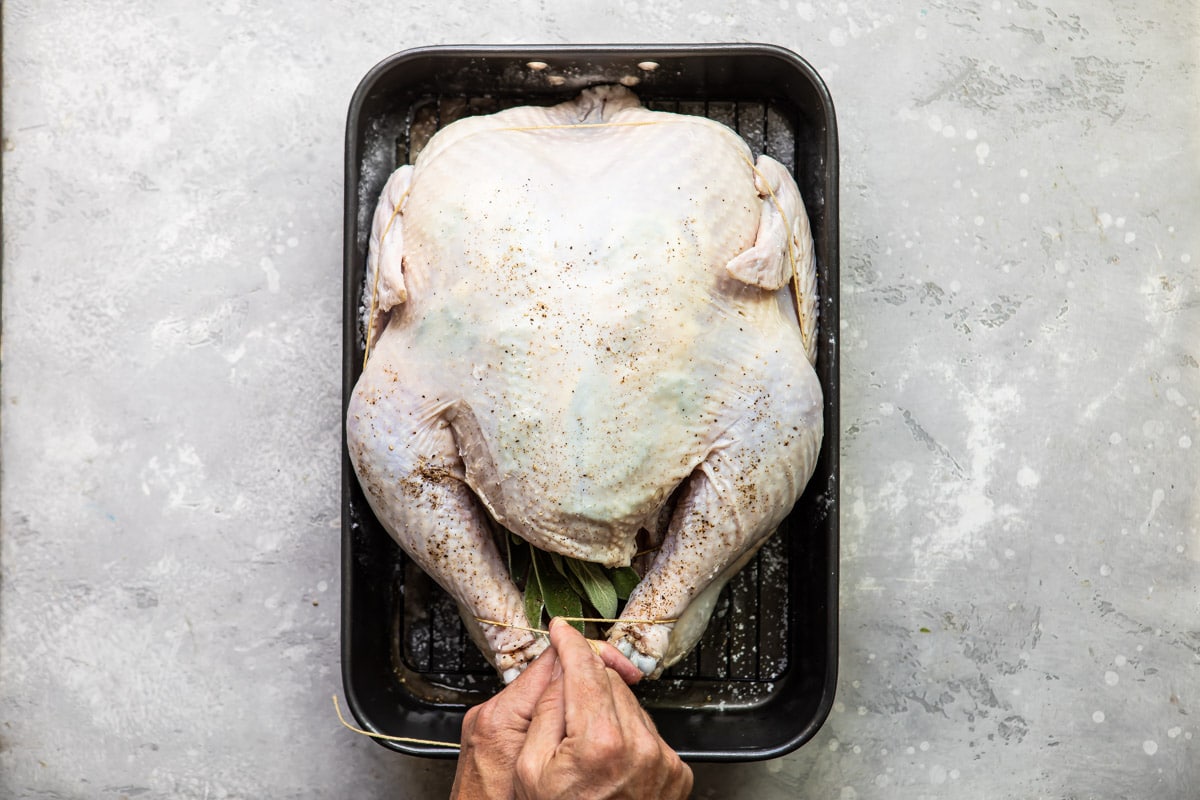
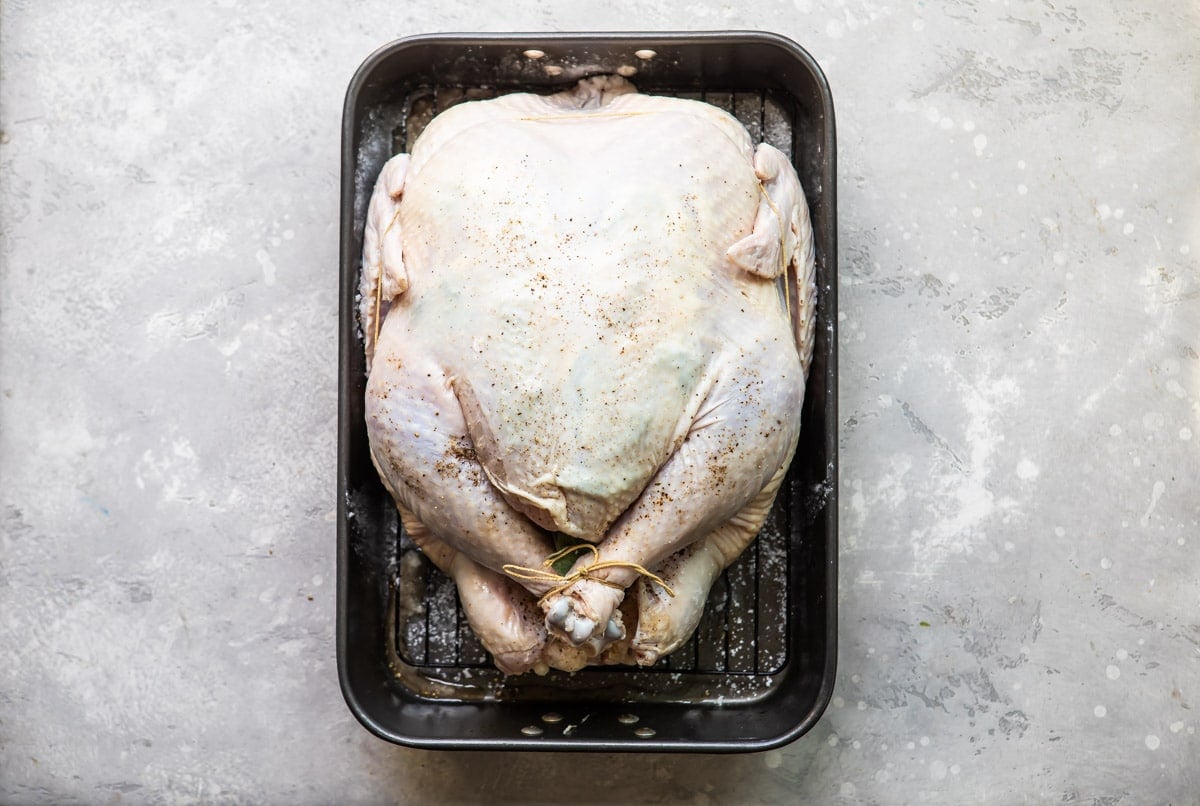
- Separate the strings, loop them around the outside of the turkey ankles, then tie a square knot to finish it off. The legs should now be cinched in close to the body. Snip the extra ends of string, and discard them.
Frequently Asked Questions
For food safety reasons, and for a more evenly cooked bird, most modern recipes don’t encourage stuffing a turkey. If you decide to stuff your turkey, combine wet and dry stuffing components just before placing them in the cavity, ensuring any raw meat, poultry, or seafood used in the stuffing is fully cooked beforehand. Do not stuff a bird with cooked stuffing. Use a large spoon or your hands to loosely stuff the body and neck cavities (do not pack it tightly because the stuffing expands while it cooks). Truss the main cavity with trussing pins to keep the stuffing inside. The stuffing must register 165 degrees on an internal thermometer to be safe to eat. For more information, see the USDA website.
More turkey techniques
Working with Meat and Fish
How to Thaw a Turkey
Working with Meat and Fish
How to Brine a Turkey
Thanksgiving Recipes
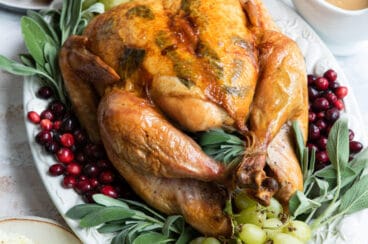
Perfect Roast Turkey
Working with Meat and Fish
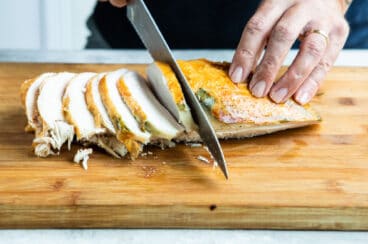
How to Carve a Turkey
Join Us
How to Truss a Turkey
Equipment
- 3 feet kitchen twine (see note 1)
Ingredients
- 1 whole turkey (see note 1)
Instructions
- Use your thumbs to tuck the wings in as you bring the string around towards the legs. Keep the string tight to force the wings firmly against the body. The string should roughly follow the contours of the turkey breast.
- Bring the string around between leg and breast, then give it one overhand knot and pull tight. The wings will be solidly pinned to the body, and the turkey breast will pop up. Note that this is NOT a solid knot – we just want to be able to tighten up on the string.
- Bring the ends of string down between the turkey's legs, then cross the legs at the "ankles" above/behind the point of the turkey breast. Make sure your previous knot is still pulled tight.
Recipe Video
Notes
- Twine: Unbleached cotton kitchen twine, also known as butcher’s twine, is strong enough to hold a turkey together but won’t burn. Pro tip: You can ask your butcher for a long piece so you’ll always have some on hand. Sometimes I find it at HomeGoods or I buy this twine on Amazon (Culinary Hill may earn money if you buy through this link).
- Turkey: Any kind of bird you like: pre-brined, dry-brined, Kosher, heritage, or natural turkeys all benefit from trussing.
Nutrition
Meggan Hill is a classically-trained chef and professional writer. Her meticulously-tested recipes and detailed tutorials bring confidence and success to home cooks everywhere. Meggan has been featured on NPR, HuffPost, FoxNews, LA Times, and more.
Thanks for the step by step!