This post may contain affiliate links. For more information, please see our affiliate policy.
Follow this simple, methodical tutorial for How to Carve a Turkey. Using a sharp carving knife, carve one side completely before moving on to the second side. Anyone can do it!
Once you have your dream Thanksgiving Turkey out of the oven and resting, it’s time to carve that bird. A properly carved turkey is both convenient for your guests and impressive to look at when arranged on a serving plate at the dinner table.
It’s easy to do, too. Carving a turkey might sound intimidating, but once you understand the technique, you can methodically move through the bird. Work on one side at a time and you’ll be done in no time.
Table of Contents
Ingredient notes
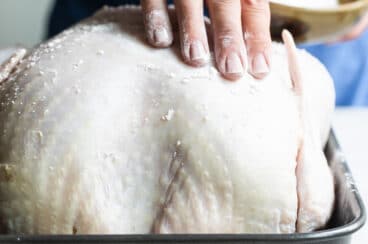
- Turkey: Look for a turkey with the words “no salt added” on the label. Stay away from “self-basting” or Kosher turkeys which are already injected with a brine. The best (and safest) way to thaw a frozen turkey is slowly in the refrigerator over the course of several days (about 4 days for a 15-pound turkey). Never thaw a turkey using warm/hot water, in the microwave, or at room temperature, all of which let bacteria grow before the turkey is thawed.
- How much turkey: Plan on 1 ¼ pounds per person. If you can’t find a turkey small enough for your group, consider a turkey breast instead. And if you’re feeding a large group, consider a couple of medium or large turkeys rather than an enormous one (it is easier to thaw and cook a couple of average birds rather than the biggest one you can find).
- Tools: Use a good, sharp knife (a carving knife, a sharp chef knife, or a serrated knife) and a two-pronged fork, tongs, or your hand. An electric knife works too, if you have one. Sharpen any knives before use for best results. You’ll also need a large carving board, ideally with a draining channel around the edge for collecting the turkey juices.
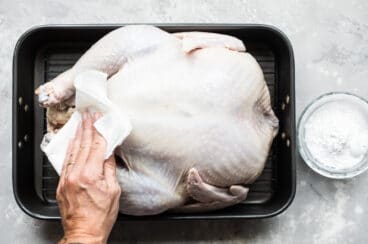
- Resting: Once out of the oven, let your roasted turkey rest, tented with aluminum foil, for 30 minutes before carving. The juices should run clear. It’s a great time to make the gravy!
- One side at a time: It’s easiest to carve one entire side of the first and then move on to the second side.
- White meat vs. dark meat: The turkey breast and wings have white meat while turkey legs and thighs have dark meat.
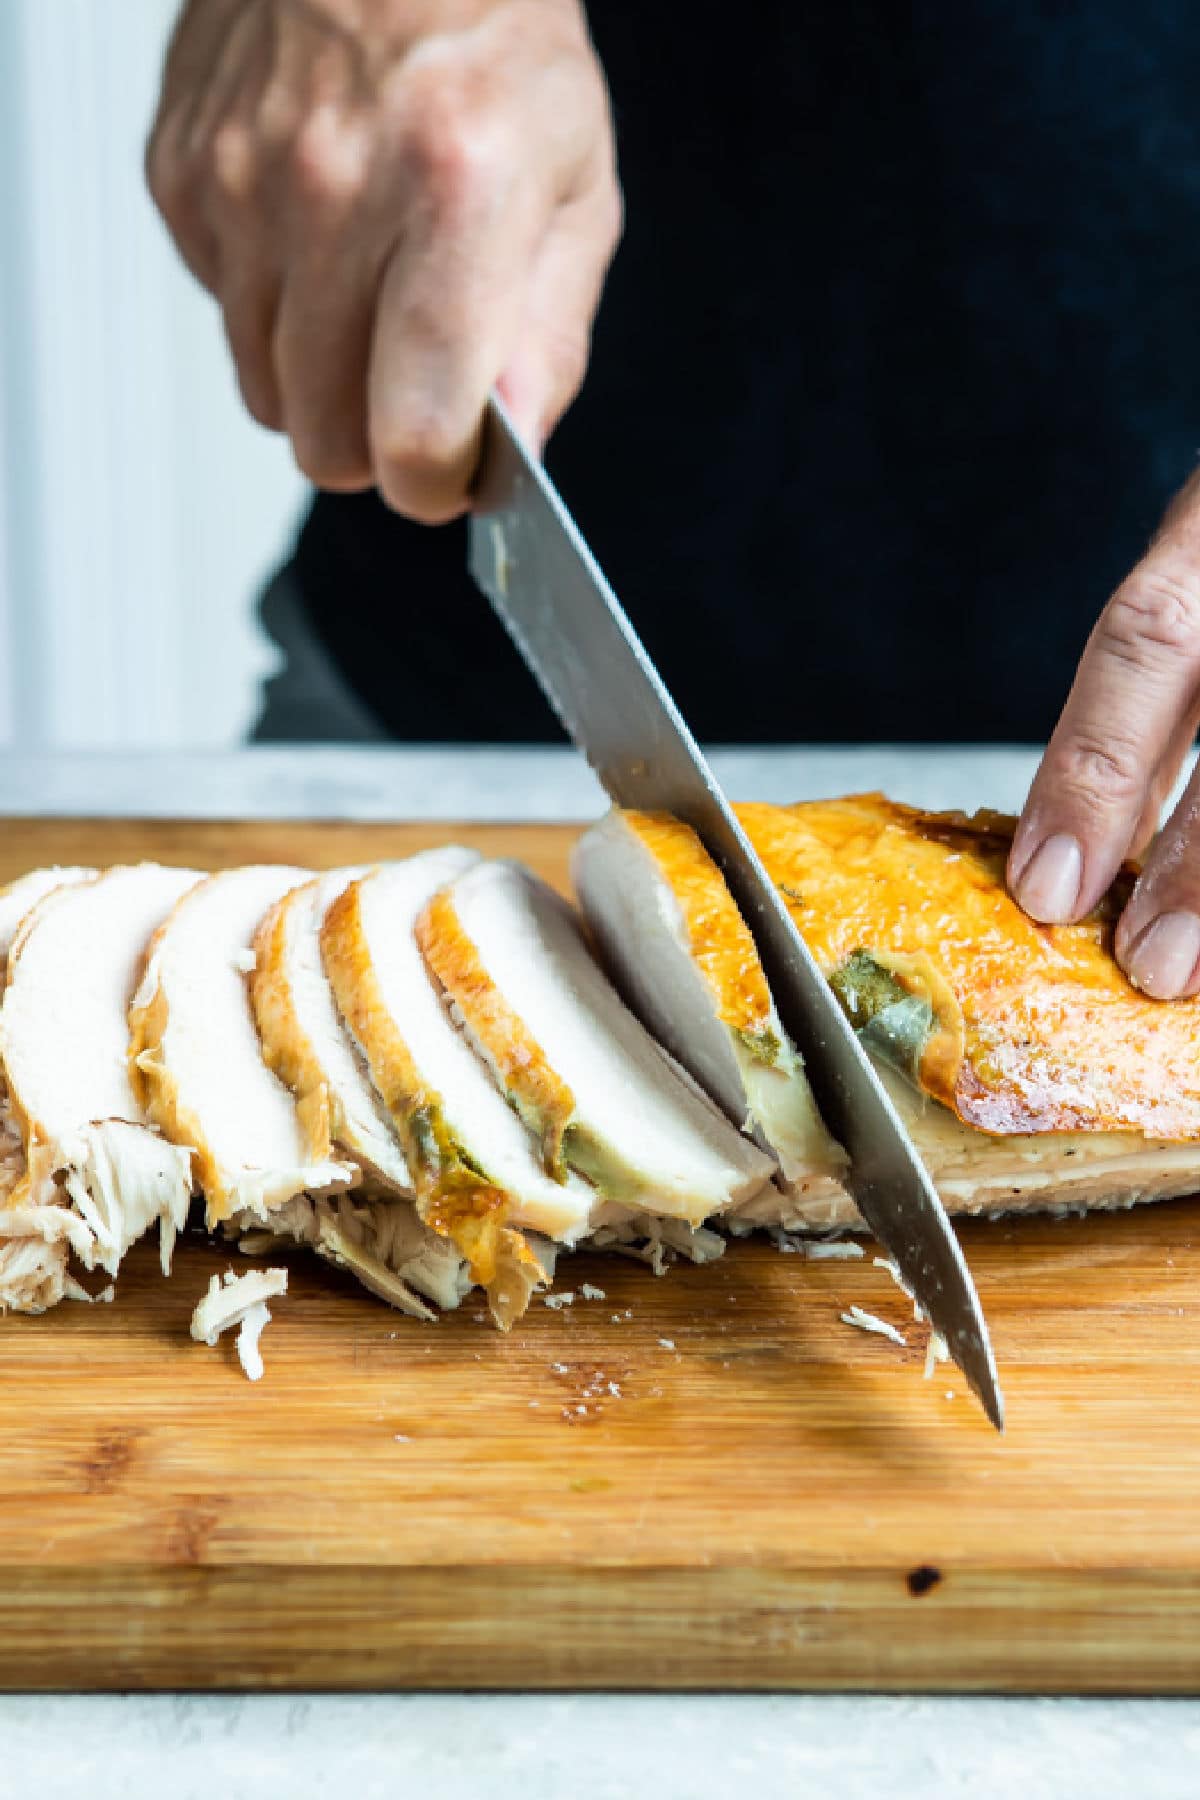
- How to carve a turkey breast: Just above the thigh and shoulder joints, carve a deep horizontal cut through the breast toward the bone to create a base cut. Starting near the breastbone, carve thin slices vertically, cutting downward to end each slice at the base cut.
Step-by-step instructions
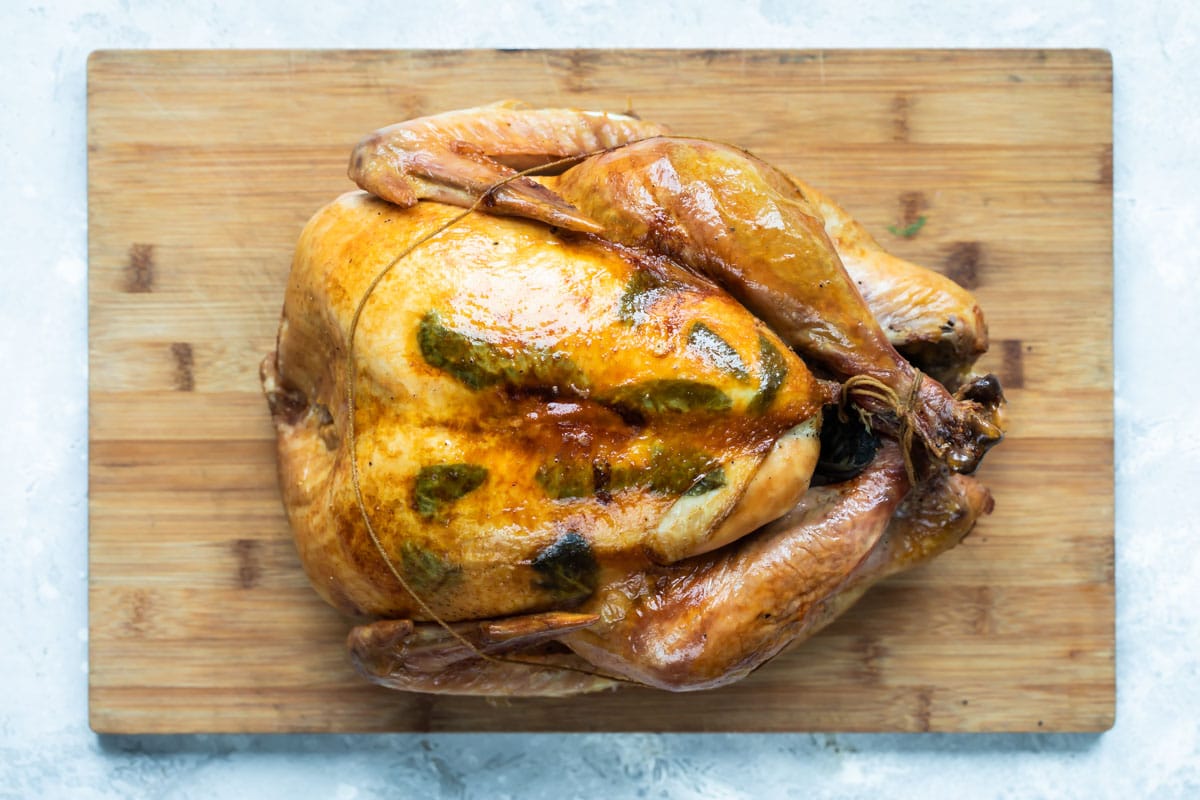
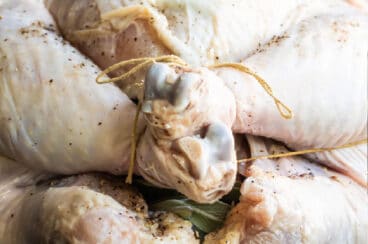
- On a large cutting board, place the turkey breast side up. Remove the trussing string. Begin carving one side of the turkey completely before moving on to the other side.
- Removing the wing: Pull the wing away from the body and slice through the skin to locate the shoulder joint. Cut through the joint to remove the wing.
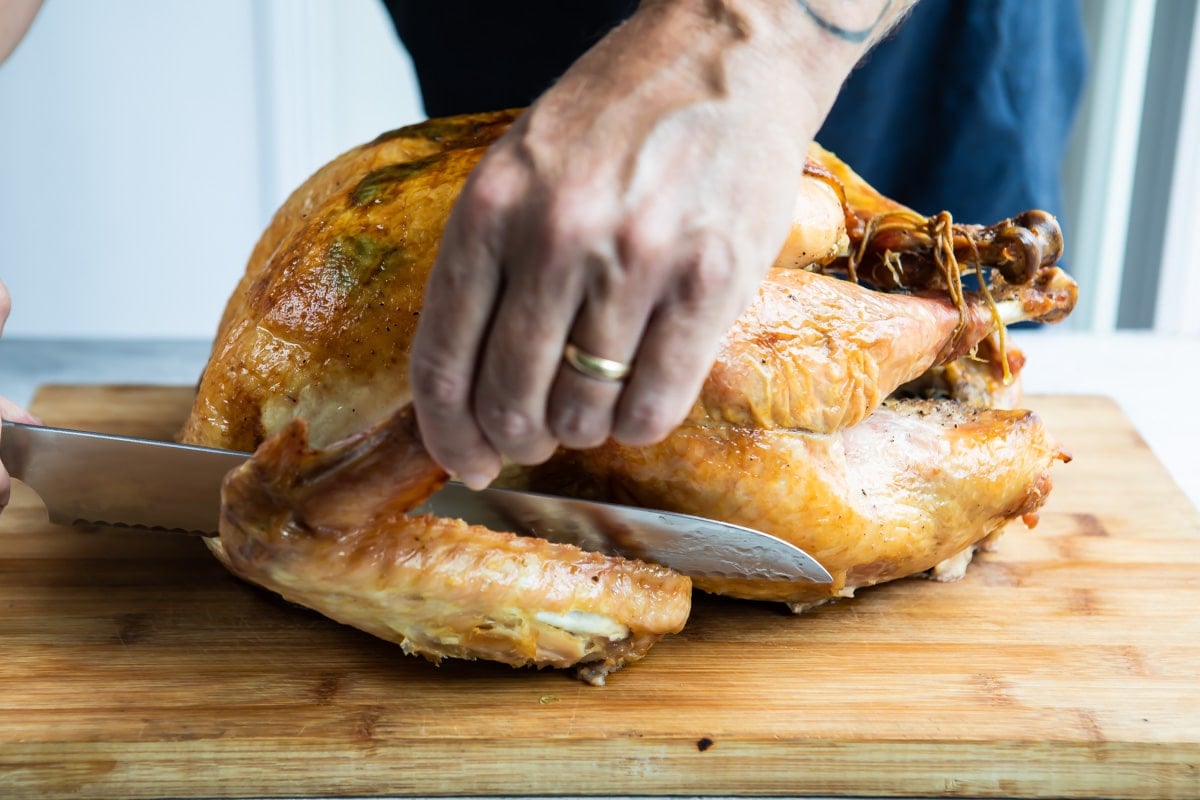
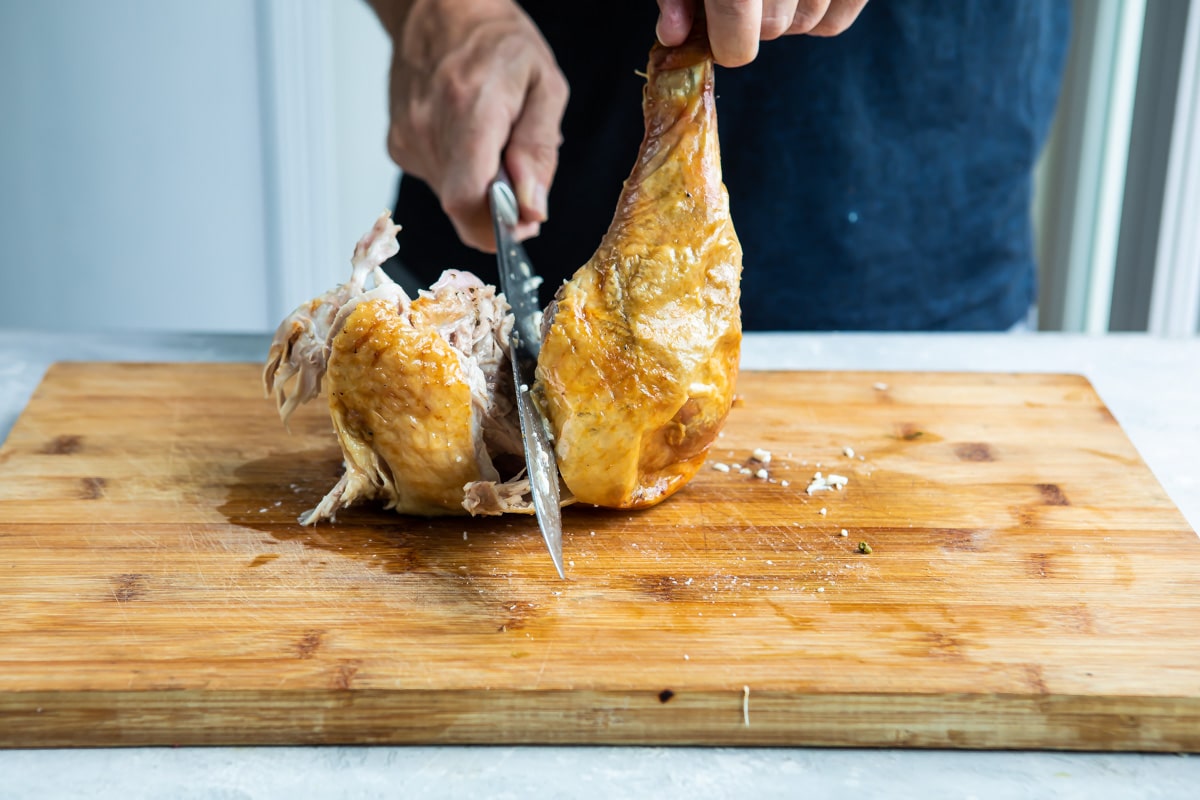
- Removing the whole leg: Pull the leg away from the body and slice through the skin to locate the thigh joint. Cut through the joint to remove the entire leg.
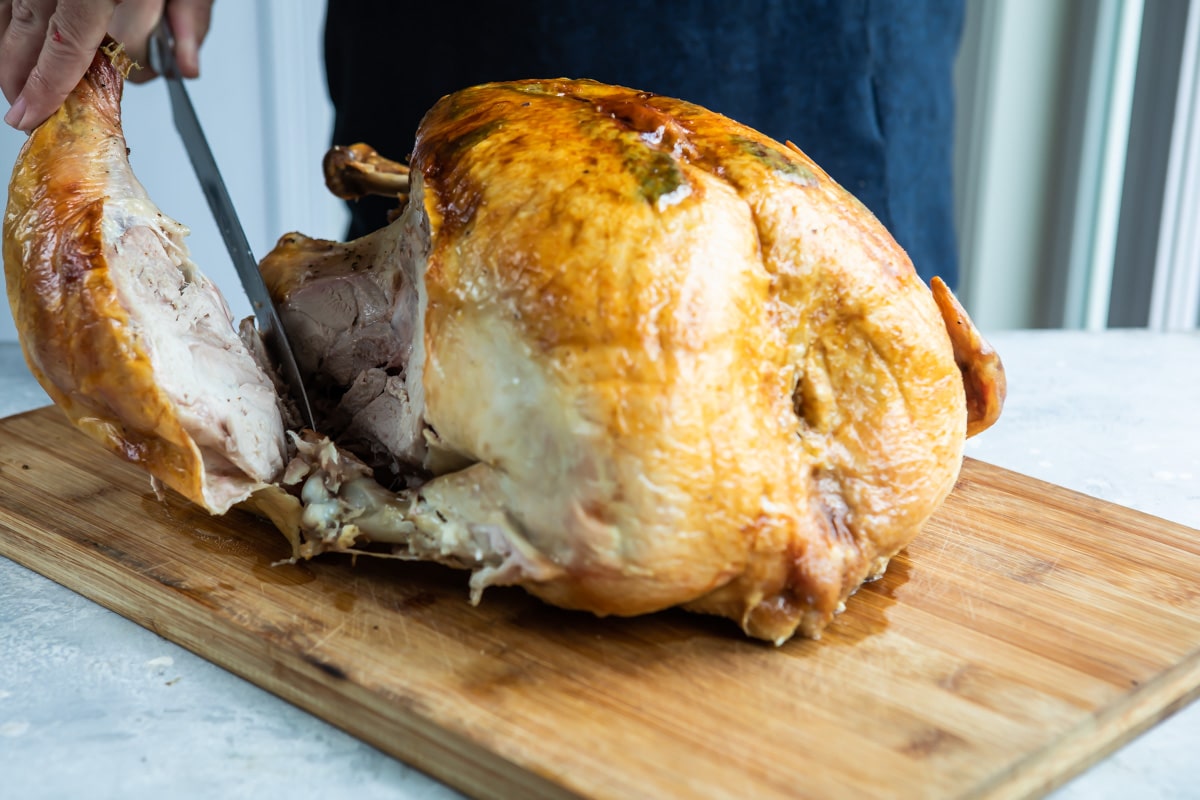
- Separating the thigh and leg: Cut through the joint that separates the drumstick from the thigh bone. Serve these pieces whole, or carve them by cutting off the meat in thin slices parallel to the bone.
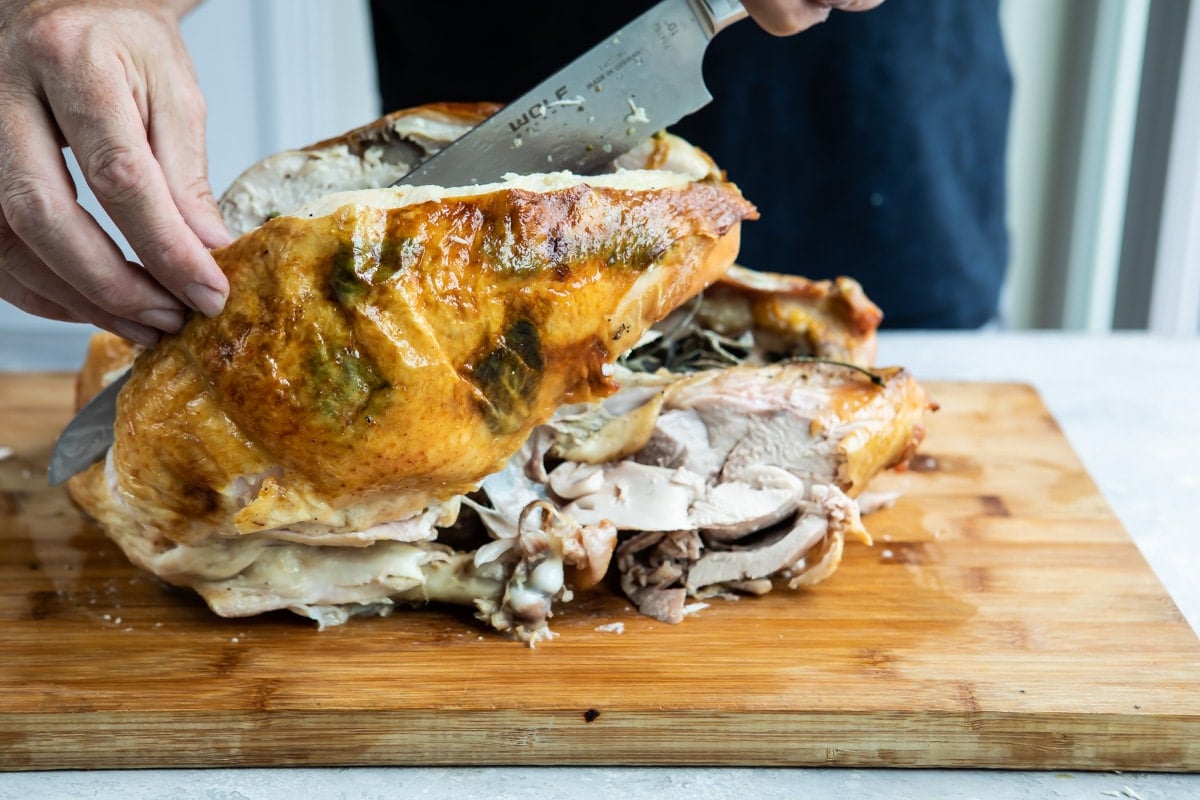
- How to carve a turkey breast: Cut along the side of the breastbone while following the curvature of the bones, breasts skin side up. Using your hand or a carving fork, gently pull the breast meat away from the side of the breast bone while using the knife to remove the meat from the ribs.
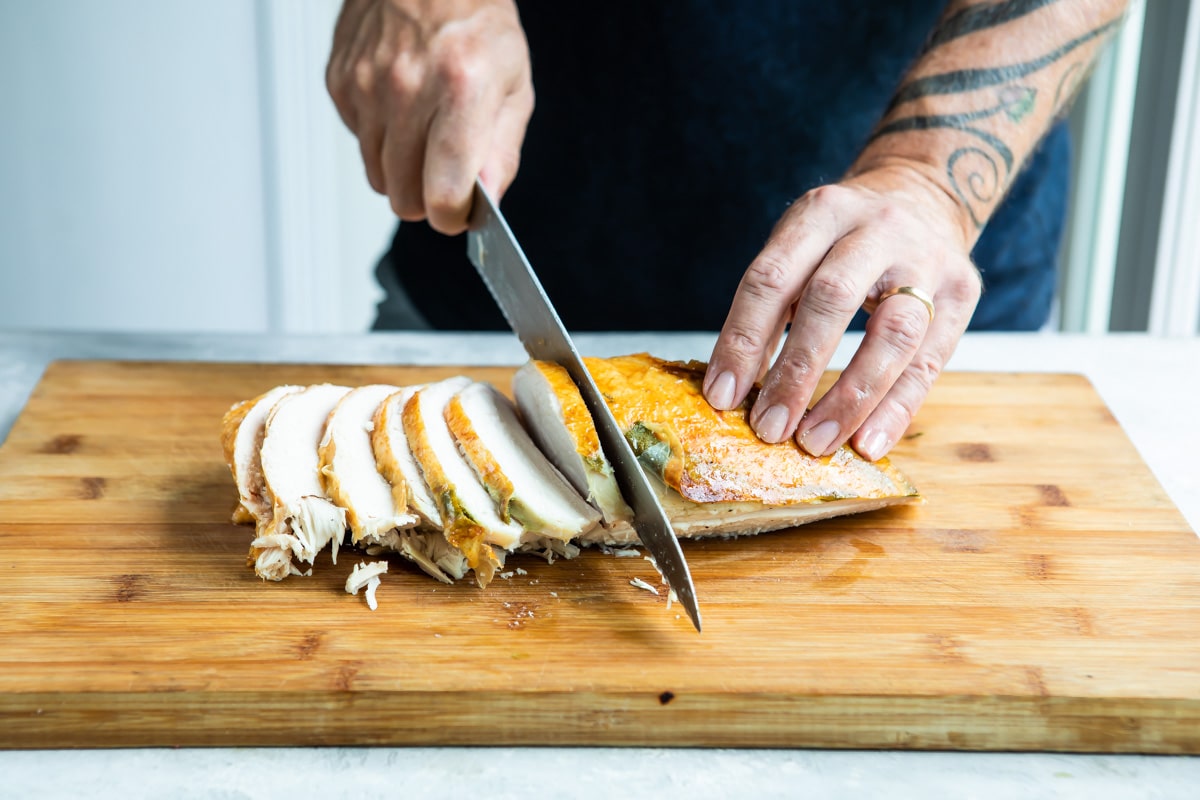
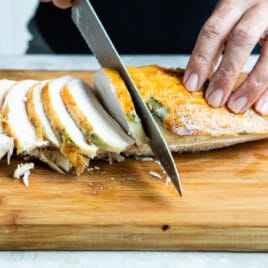
- Place turkey breast on the cutting board. Slice the breast meat on an angle against the grain to your desired thickness.
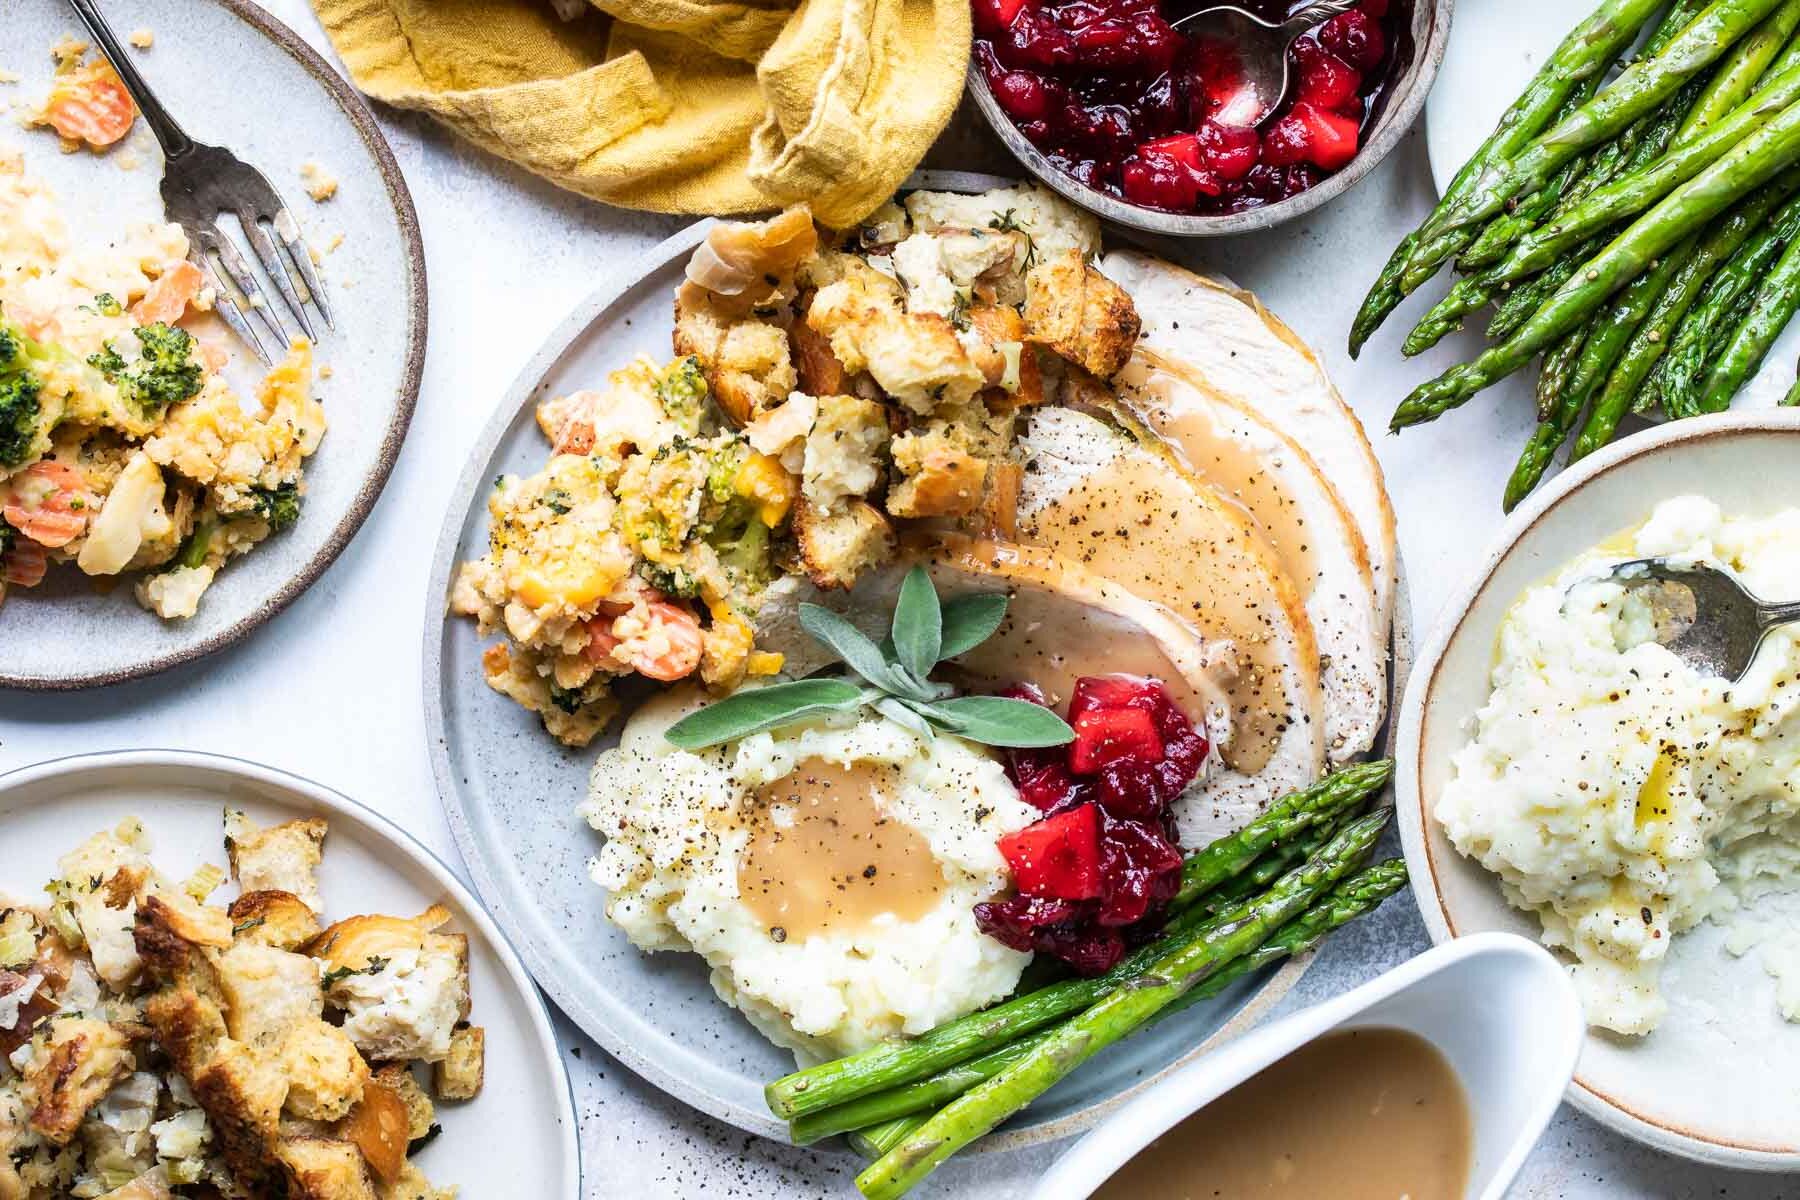
- Repeat with the second side of the turkey. Arrange cut portions on a serving platter and pass the gravy separately.
Recipe tips and variations
- Yield: Plan for 1 ¼ pounds of turkey per person (some of the weight is from bones). This recipe assumes a 15-pound bird will feed about 12 people (about 1 ½ cups of turkey per person or 18 cups total). The math is 12 people x 1.25 pounds per person = 15-pound turkey.
- Storage: Store leftovers covered in the refrigerator for up to 4 days.
- Make ahead: Get a jump start on your Thanksgiving prep with my easy Make Ahead Turkey recipe. First, roast, carve, and freeze the turkey in its juices. Then thaw, reheat, and make the gravy.
- Table-side carving: Follow this method if you prefer to carve the turkey at the table, rather than handle everything backstage. Just above the thigh and shoulder joints, carve a deep horizontal cut through the breast toward the bone to create a base cut. Starting near the breastbone, carve thin slices vertically, cutting downward to end each slice at the base cut.
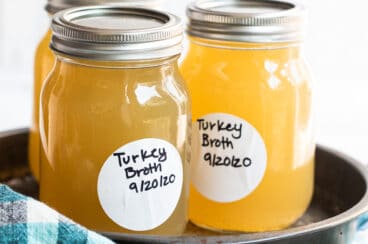
- Ultimate Turkey Guide: Cook your best Thanksgiving menu (or Sunday dinner) ever. Brush up on how to buy, thaw, brine, and cook a turkey, plus learn how easy it is to make turkey broth from bones and turkey gravy from pan drippings.
- Roasting times may vary: After all, you may be cooking a slightly smaller or larger turkey. An unstuffed turkey takes about 15 minutes per pound when roasted at 325 degrees. However, the best way to tell if a turkey is properly roasted is with a good meat thermometer (165 degrees at the thickest part of the thigh).
- Roasted Turkey Breast: For a small Thanksgiving menu or a Sunday dinner, try my favorite Roast Turkey Breast recipe. A dry brine and basting yields craveably crisp skin, and the meat itself is juicy and flavorful.
- Slow Cooker Turkey Breast: This recipe delivers a delicious, tender bird without taking up any oven space.
- Make turkey broth or soup: Put your leftover turkey carcass to work in a pot of delicious homemade Turkey Broth or the best Leftover Turkey Noodle Soup you’ve ever had.
Frequently Asked Questions
For food safety reasons, and for a more evenly cooked bird, most modern recipes don’t encourage stuffing a turkey. If you decide to stuff your turkey, combine wet and dry stuffing components just before placing them in the cavity, ensuring any raw meat, poultry, or seafood used in the stuffing is fully cooked beforehand. Do not stuff a bird with cooked stuffing. Use a large spoon or your hands to loosely stuff the body and neck cavities (do not pack it tightly because the stuffing expands while it cooks). Truss the main cavity with trussing pins to keep the stuffing inside. The stuffing must register 165 degrees on an internal thermometer to be safe to eat. For more information, see the USDA website. Stuffing chicken and Cornish hens is also discouraged.
More turkey techniques
Working with Meat and Fish
How to Thaw a Turkey
Working with Meat and Fish
How to Brine a Turkey
Working with Meat and Fish
How to Truss a Turkey
Stock, Sauce, and Spread Recipes
How to Make Turkey Broth
Join Us
How to Carve a Turkey
Ingredients
For the turkey:
- 1 (14 pound) whole turkey roasted
Instructions
- On a large cutting board, place the turkey breast side up. Remove the truss. Begin carving one side of the turkey completely before moving on to the other side.
- Removing the wing: Pull the wing away from the body and slice through the skin to locate the shoulder joint. Cut through the joint to remove the wing.
- Removing the whole leg: Pull the leg away from the body and slice through the skin to locate the thigh joint. Cut through the joint to remove the entire leg.
- Separating the thigh and leg: Cut through the joint that separates the drumstick from the thigh. Serve these pieces whole, or carve them by cutting off the meat in thin slices parallel to the bone.
- Removing the breast: Cut along the breastbone while following the curvature of the bones. Using your hand or a carving fork, gently pull the breast meat away while using the knife to remove the meat from the ribs. Place turkey breast on the cutting board. For larger slices, slice the breast meat on an angle.
- Repeat with the second side of the turkey. Arrange cut portions on a serving platter and pass the gravy separately.
Recipe Video
Notes
- Resting: Once out of the oven, let your roasted turkey rest, tented with foil, for 30 minutes before carving. The juices should run clear. It’s a great time to make the gravy!
- Tools: Use a good, sharp carving knife and a two-pronged fork or your hand.
- One side at a time: It’s easiest to carve one entire side of the first and then move on to the second side.
- How to carve a turkey breast: Just above the thigh and shoulder joints, carve a deep horizontal cut through the breast toward the bone to create a base cut. Starting near the breastbone, carve thin slices vertically, cutting downward to end each slice at the base cut.
Nutrition
Meggan Hill is a classically-trained chef and professional writer. Her meticulously-tested recipes and detailed tutorials bring confidence and success to home cooks everywhere. Meggan has been featured on NPR, HuffPost, FoxNews, LA Times, and more.
You saved me. I looked like a professional chef last weekend when I made this for my inlaws!
Hi Wendy! I’m so glad to have helped! I’m glad you enjoyed it! – Meggan