This post may contain affiliate links. For more information, please see our affiliate policy.
Mastering homemade yeast bread is easy with this foolproof No-Knead Bread recipe in your repertoire. You’ll never want to buy bread again after tasting a slice from this chewy, delicious No-Knead Bread recipe (that bakes in just 30 minutes!).
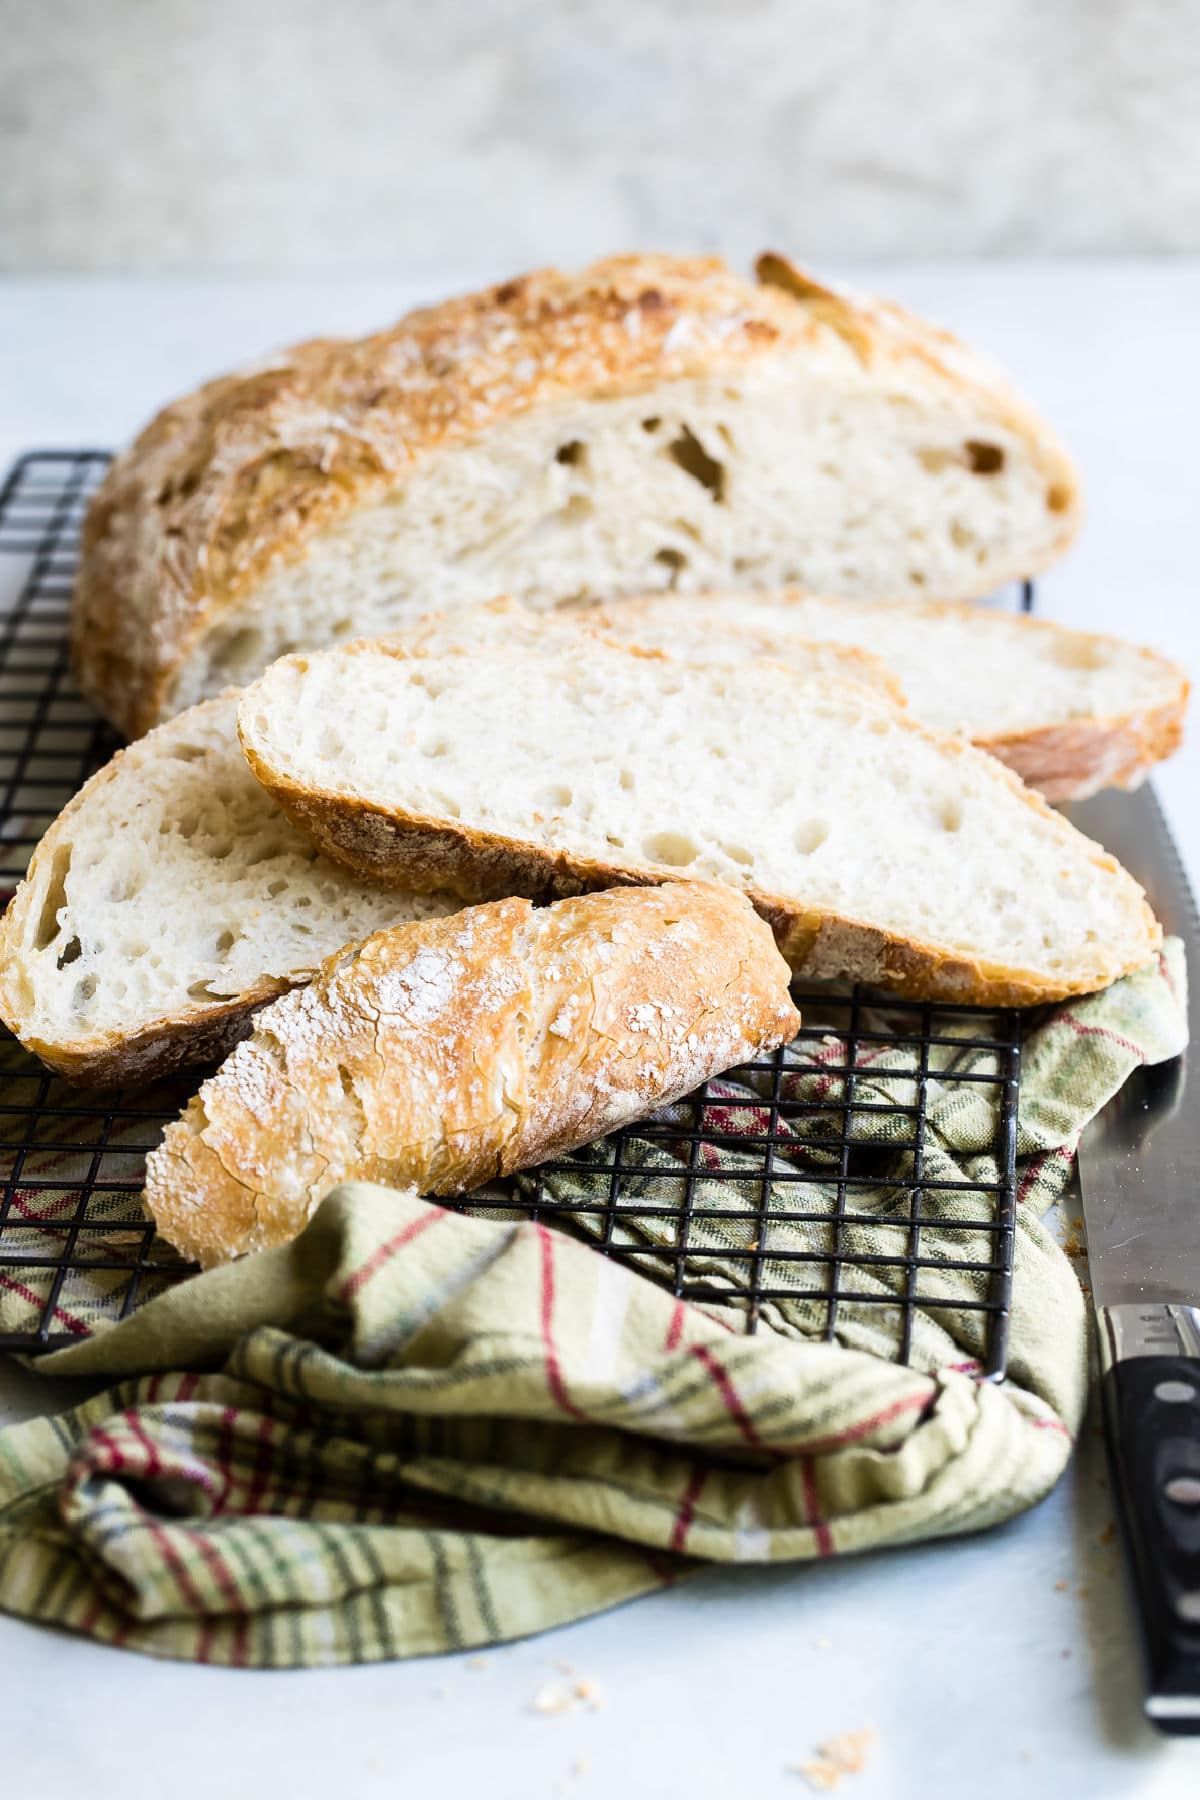
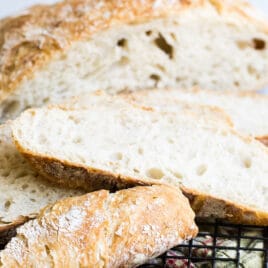
You need not be a professional baker to whip up a crusty-on-the-outside, tender-on-the-inside yeast bread recipe. This No-Knead Bread makes it easy.
All credit for this beginner yeast bread recipe goes to Jim Lahey from Sullivan Street Bakery, who created this bread recipe. Since he shared it in The New York Times in 2006, this No-Knead Bread recipe has been wildly popular for years in certain, bread-loving circles. It’s only fair that this carb-loving circle be introduced to it.
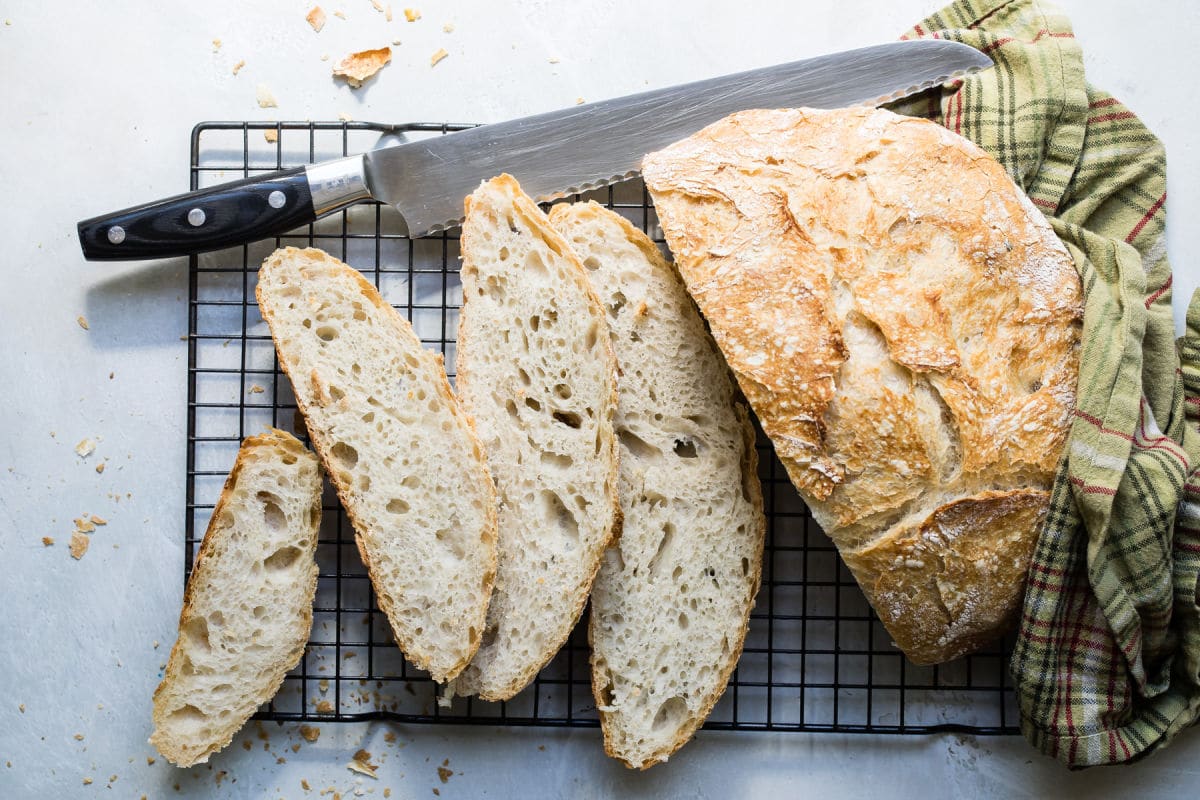
It’s a wonderful recipe for a rustic bread with a ton of character, and a dense, chewy interior. Plus, this bread comes out of the oven so show-stoppingly gorgeous, no one will believe you when you tell them you made the yeast bread from scratch. In fact, they might have to try another piece just to be convinced.
Do you need fancy flour to make this heavenly bread? No. What about sourdough starter? Nope. Is it really and truly no-knead? Yes. Should you make this today to enjoy tomorrow? Absolutely.
Even if you’ve never baked a thing in your life.
Table of Contents
Recipe ingredients

At a Glance: Here is a quick snapshot of what ingredients are in this recipe.
Please see the recipe card below for specific quantities.
Ingredient and equipment notes
- Flour: Classic all-purpose or higher-protein bread flour; either works great.
- Instant yeast: Also known as Rapid Rise, Bread Machine, SAF, QuickRise, Instant Active Dry, or Gourmet Perfect Rise. If you absolutely can’t find it, use ⅓ teaspoon of regular yeast for this specific recipe.
- Salt: Kosher salt is best.
- 6- to 8-quart heavy covered pot: This can be Pyrex, ceramic, cast iron, or a fancy Dutch oven. It needs a lid for the first stage of the baking. Make sure the knob on the lid is safe for high-heat cooking temperatures.
- 2 clean cotton kitchen towels: Not terrycloth, just plain, woven cotton towels are best.
- Plastic wrap: For covering the dough during the fermentation and rising process.
- Parchment paper: Optional, but a square of parchment pressed into the bottom of the pot makes it easier to remove the loaf after it has finished baking.
Step-by-step instructions
- In a large bowl, whisk together the flour, yeast, and salt. Add the water and mix with a wooden spoon until you have a shaggy, sticky dough.
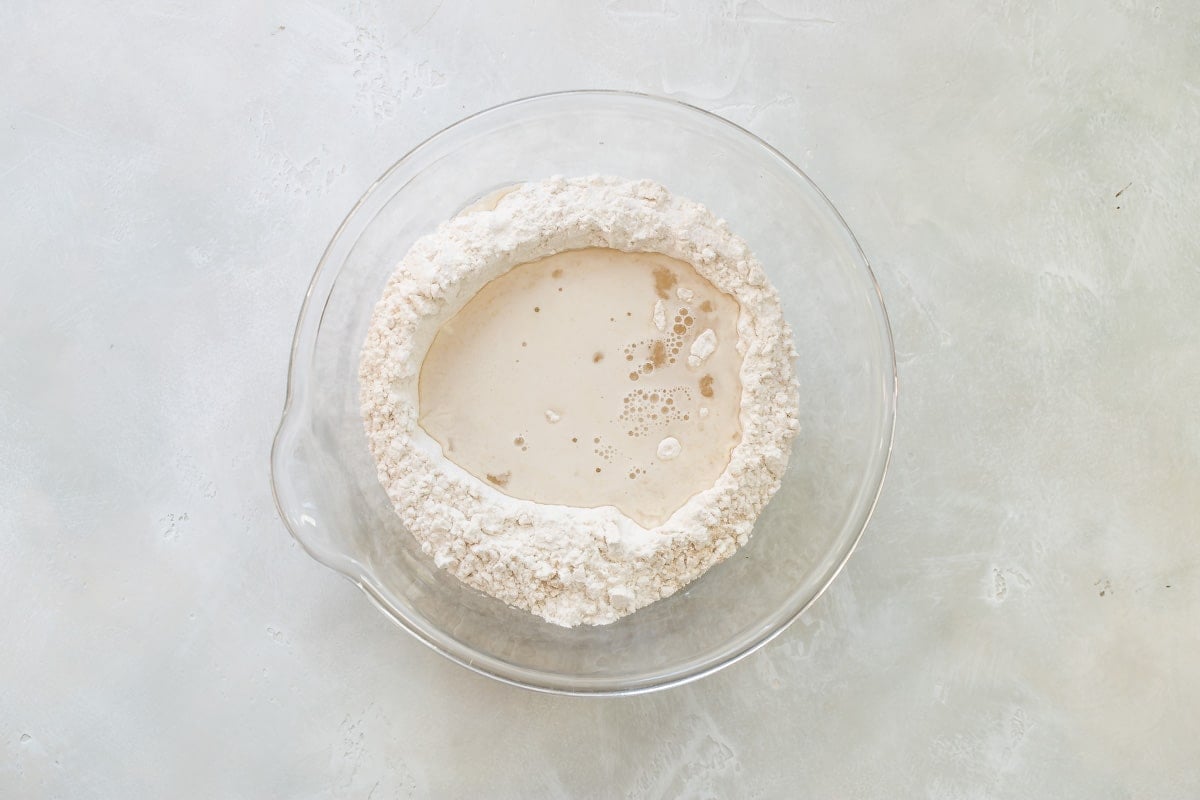
- This should take roughly 30 seconds. You want it to be really sticky, maybe even unusually wet looking. Cover the bowl with plastic wrap and allow to rest for 18 hours in a room temperature (70-72 degrees) space to ferment, out of direct sunlight.
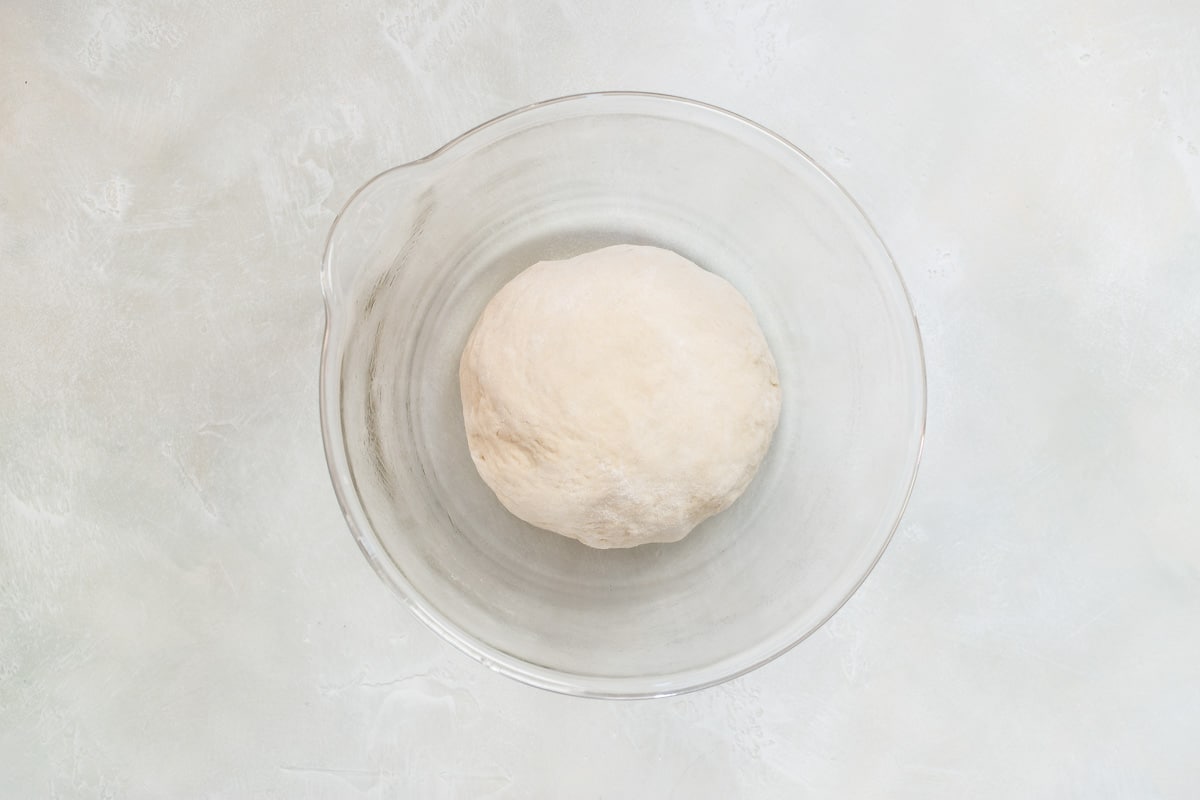
- The dough will be ready when it’s dotted with bubbles and appears a bit darkened. Place the dough on a lightly floured work surface. Sprinkle a little flour on the dough, fold it over on itself once or twice and loosely cover with plastic wrap. Let dough rest for about 15 minutes.
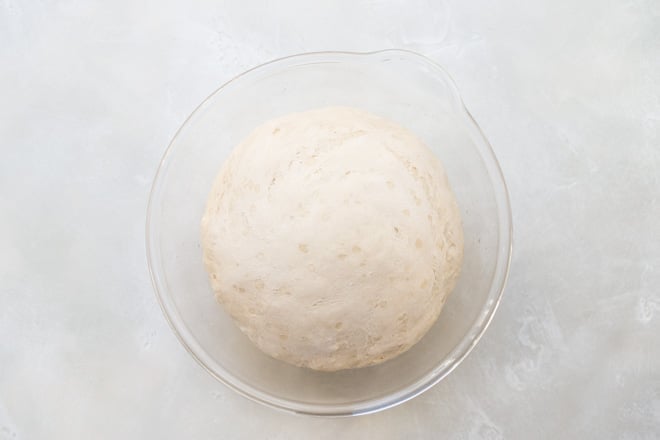
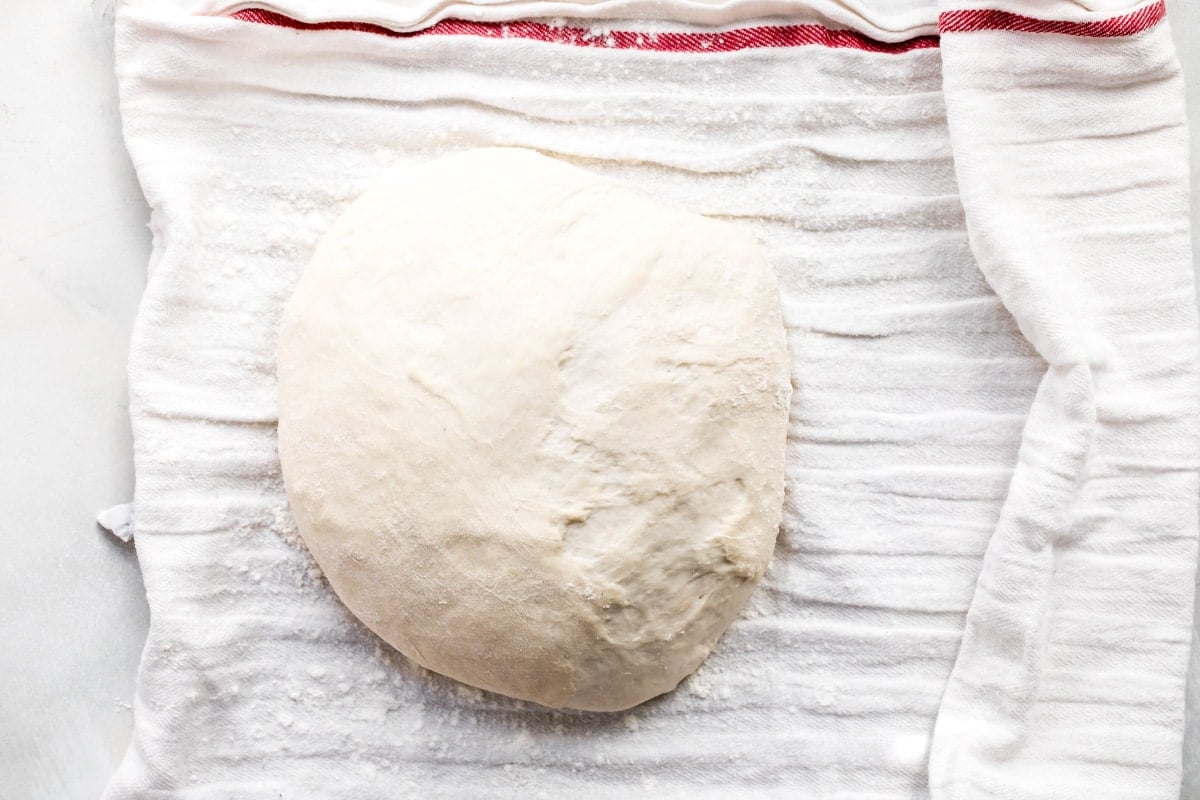
- Sprinkle a little more flour on the work surface and using your fingers or a pastry scraper, quickly shape dough into a ball. Generously coat a kitchen towel (not terrycloth) with flour. Place dough seam side down on the towel and dust dough with more flour. Cover dough with another towel and let dough rise for 2 hours. Dough is ready when it has more than doubled in size and will not spring back when poked with your finger.
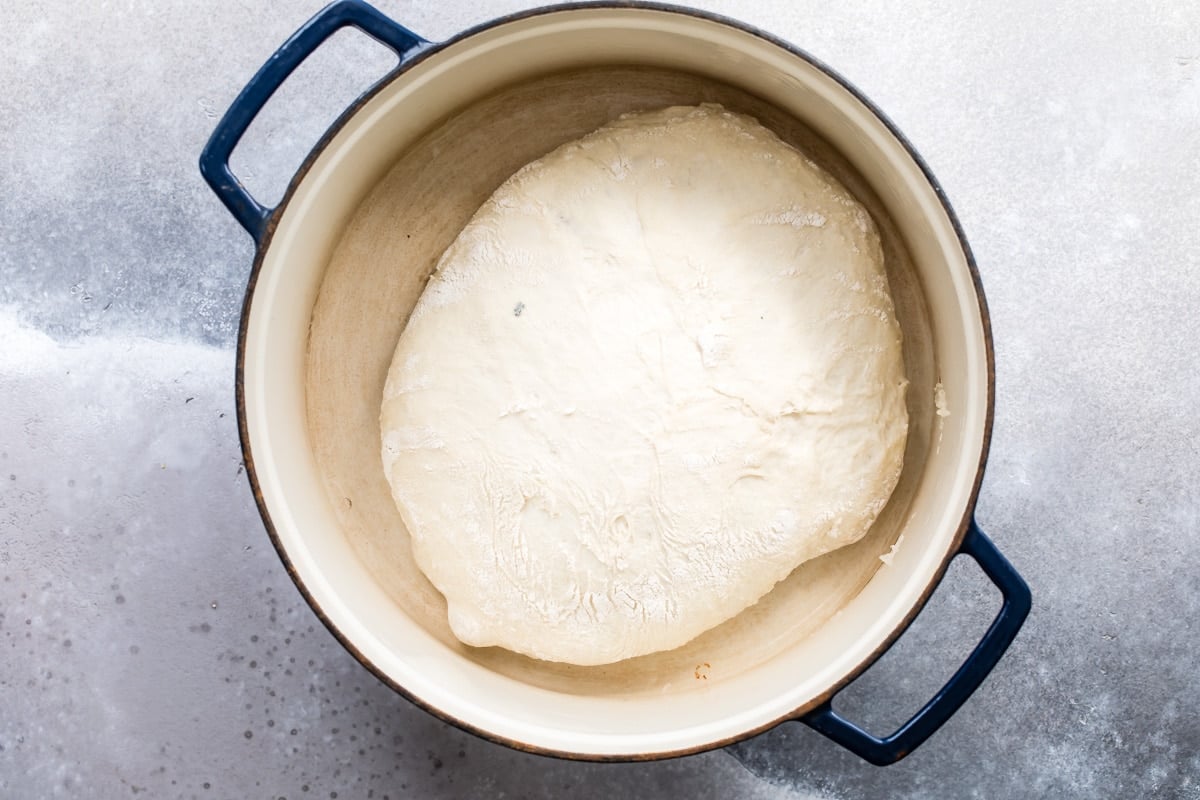
- At least 30 minutes before dough is ready, preheat oven to 450 degrees and place a 6 to 8-quart heavy covered pot in the oven (must be safe at high temperatures; If you have an enamel Dutch oven with a phenolic knob, they’re only safe for baking at lower temperatures; switch out your knob for a stainless steel one). When the dough is ready, carefully remove the pot from the oven. Slide your hand under the towel and turn the dough into the pot, seam side up. The dough may look messy, that’s okay! Give it a sturdy shake to evenly distribute the dough. It will even out more during baking.
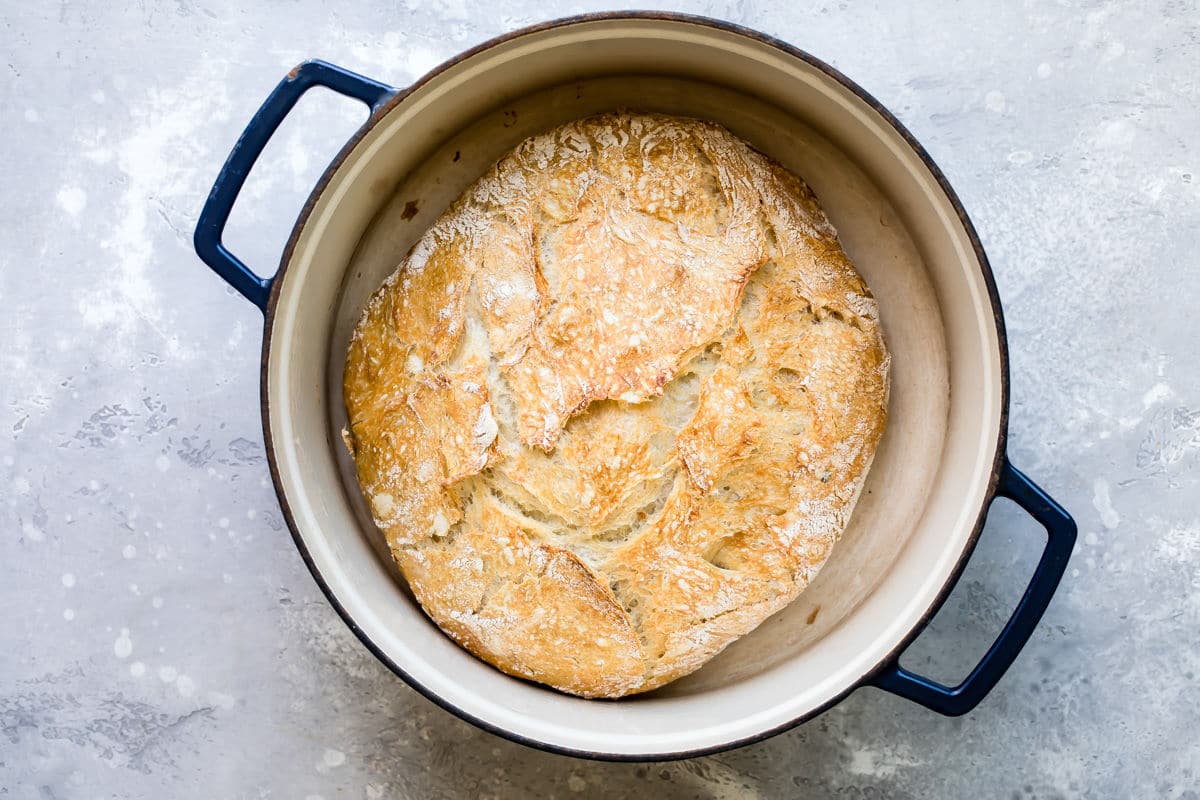
- Cover pot and bake for 30 minutes. Remove lid and bake for 15-30 minutes, until the loaf is beautiful and browned. Remove from pot and allow to cool one hour on a wire rack.
Recipe tips and variations
- Yield: This bread recipe makes six thick slices of No-Knead Bread. I think it’s easy enough that you can (and should!) make a few loaves per week.
- Storage: Wrap your loaf in plastic or foil and store at room temperature in a dark place, if possible) (f you store it in a cloth bag, it will dry out and harden). Never refrigerate bread.
- Freezer: Wrap the bread in a freezer-safe bag and freeze for up to 6 months. Thaw at room temperature.
- Plan ahead: The longer rise and the small amount of yeast results in a richer bread, but it does require patience and a bit of advance planning. In general, plan to start the bread roughly 24 hours before you need it.
- Bread pairing ideas: Serve slices alongside White Bean and Kale Soup, Beef Stew, Minestrone Soup, or your favorite brothy blend, and you’ve made a good lunch even better. Or just carve off giant slices to eat with butter and a sprinkle of sea salt. Oh yes, and grilled cheese doesn’t get any better than when it starts on two slices of No-Knead Bread.
- Beer Bread: This Beer Bread Recipe is a yeast-free quick bread leavened with baking powder and beer or any other carbonated beverage like clear soda, ginger ale, or sparkling water. It’s soft and delicious, perfect with butter or creamy dips and spreads.
Recipe FAQs
With regular bread, you form the strands of gluten by kneading it. With no-knead bread, the gluten is formed through a long fermentation process.
French Onion Soup
This cheesy and easy French Onion Soup tastes like it came straight from Parisian cafe. But you need not book a flight to enjoy my big-batch homemade French Onion Soup! Who’s ready to spoon?
View Recipe
Perfect No-Knead bread pairings

Soup and Stew Recipes
Beef Stew Recipe

Soup and Stew Recipes
Cream of Broccoli Soup

Soup and Stew Recipes
Slow Cooker Ham and Bean Soup

Soup and Stew Recipes
Venison Chili
Join Us
No Knead Bread
Ingredients
- 3 cups all-purpose flour plus more for working (see note 1)
- ¼ teaspoon instant yeast (see note 2)
- 1 1/4 teaspoons Salt (see note 3)
- 1 1/2 cups water
Instructions
- In a large bowl, whisk together the flour, yeast, and salt. Add the water and mix with a wooden spoon until you have a shaggy, sticky dough. This should take roughly 30 seconds. You want it to be really sticky, maybe even unusually wet looking.
- Cover the bowl with plastic wrap and allow to rest for 18 hours in a room temperature (70-72 degrees) space to ferment, out of direct sunlight. The dough will be ready when it’s dotted with bubbles and appears a bit darkened.
- Place the dough on a lightly floured work surface. Sprinkle a little flour on the dough, fold it over on itself once or twice and loosely cover with plastic wrap. Let dough rest for about 15 minutes.
- Sprinkle a little more flour on the work surface and using your fingers or a pastry scraper, quickly shape dough into a ball.
- Generously coat a kitchen towel (not terrycloth) with flour. Place dough seam side down on the towel and dust dough with more flour. Cover dough with another towel and let dough rise for 2 hours. Dough is ready when it has more than doubled in size and will not spring back when poked with your finger.
- At least 30 minutes before dough is ready, preheat oven to 450 degrees and place a 6 to 8-quart heavy covered pot in the oven. This can be cast iron, Pyrex, enamel, or ceramic, just as long as it's oven-friendly at higher temperatures. (If you have an enamel Dutch oven with a phenolic knob, they're only safe for baking at lower temperatures; switch out your knob for a stainless steel one.)
- When the dough is ready, carefully remove the pot from the oven. Slide your hand under the towel and turn the dough into the pot, seam side up. The dough may look messy, that's okay! Give it a sturdy shake to evenly distribute the dough. It will even out more during baking.
- Cover pot and bake for 30 minutes. Remove lid and bake for 15-30 minutes, until the loaf is beautiful and browned. Remove from pot and allow to cool one hour on a wire rack.
Notes
- Flour: Classic all-purpose or higher-protein bread flour; either works great.
- Instant yeast: Also known as Rapid Rise, Bread Machine, SAF, QuickRise, Instant Active Dry, or Gourmet Perfect Rise. If you absolutely can’t find it, use ⅓ teaspoon of regular yeast for this specific recipe.
- Salt: Kosher salt is best.
- Yield: This bread recipe makes six thick slices of No-Knead Bread. I think it’s easy enough that you can (and should!) make a few loaves per week.
- Storage: Wrap your loaf in plastic or foil and store at room temperature in a dark place, if possible) (f you store it in a cloth bag, it will dry out and harden). Never refrigerate bread.
- Freezer: Wrap the bread in a freezer-safe bag and freeze for up to 6 months. Thaw at room temperature.
Nutrition
Meggan Hill is a classically-trained chef and professional writer. Her meticulously-tested recipes and detailed tutorials bring confidence and success to home cooks everywhere. Meggan has been featured on NPR, HuffPost, FoxNews, LA Times, and more.
Has anyone tried to make half of this recipe and a smaller dutch oven
I am little puzzled about the size of the Duch oven. In the first part with general descripiton you mention Duch oven to be about 6 quart and then in the Recip part of your post you are talking about 4 quart ..it is substantiall difference. Which size of the Duch ove should I use .
Hi Dorota, I’m so sorry about that! It’s a 6 to 8 quart Dutch oven, never a 4 quart. It’s a huge difference, and that’s a huge, confusing typo. I’ve fixed it now. Sorry again. Thanks for letting me know! -Meggan
Can this recipe be made with gluten free flour such as bobs red mill 1:1?
Hi Kathy, I’m not 100% sure. I haven’t made it that way. I looked at some GF no-knead bread recipes and it was hard to tell because some of the recipes had additional ingredients (vinegar, oil, eggs) so it wasn’t an exact match. I will put it on my list to test. I feel like there aren’t any stand-out GF no-knead bread recipes at the top of the google search results, so maybe other people could benefit from this recipe too. Then again, sometimes the best recipes get buried on the Internet. I won’t be able to get back to you with my results in any sort of reasonable time frame, so please don’t wait around for me, but I will test it in the next couple of months. Thank you! -Meggan