This post may contain affiliate links. For more information, please see our affiliate policy.
One of the best panini presses can be an unexpected gadget for a quick breakfast, lunch, or dinner. It’s Meggan’s secret weapon for turning simple slices of bread and fillings into delectable, restaurant-quality, gourmet sandwiches at home.
The best panini presses should offer versatility, excellent grilling, temperature control, be easy to clean, and have additional features, like floating hinges and interchangeable plates. While Meggan’s go-to is the Cuisinart Elite Griddler for its versatility and ease of use, we wanted to find what other great options are out there.
Together, we researched the best ones on the market, looking for features like the type of hinges or plates used and heating power. We also read hundreds of reviews to get an idea of each sandwich press’ reliability, performance, and customer satisfaction.
Below, find more info on the best panini presses for making grilled cheese, grilled sandwiches, and so much more.
Table of Contents
Our Top Picks
- What’s in Meggan’s Kitchen: Cuisinart Griddler Elite – $157.85 at Amazon
- Easiest to Use: Hamilton Beach Electric Panini Press Sandwich Maker – $39.99 at Walmart
- Best Splurge Panini Press: Breville Sear and Press Grill – $199.95 at Amazon
- Best Budget Panini Press: Chefman Panini Press Grill – $38.48 at Walmart
Reviews of The Best Panini Presses
1. What’s in Meggan’s Kitchen: Cuisinart Griddler Elite
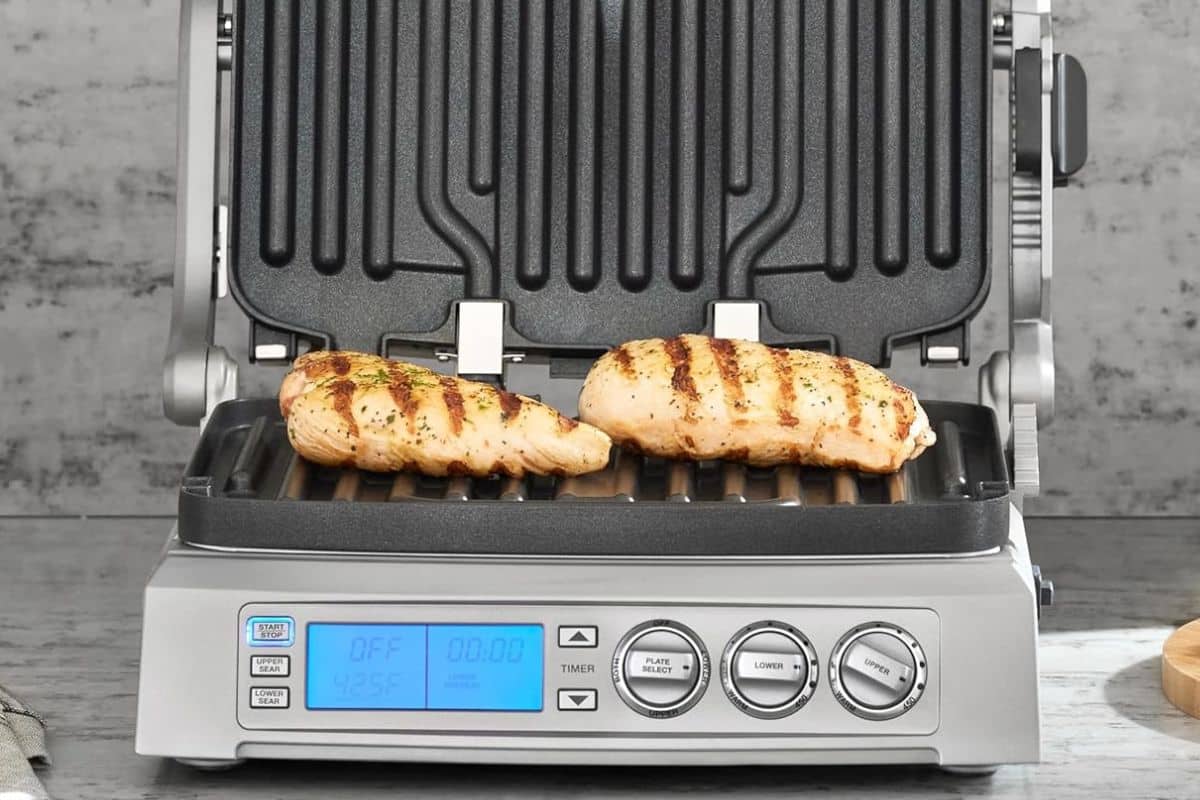
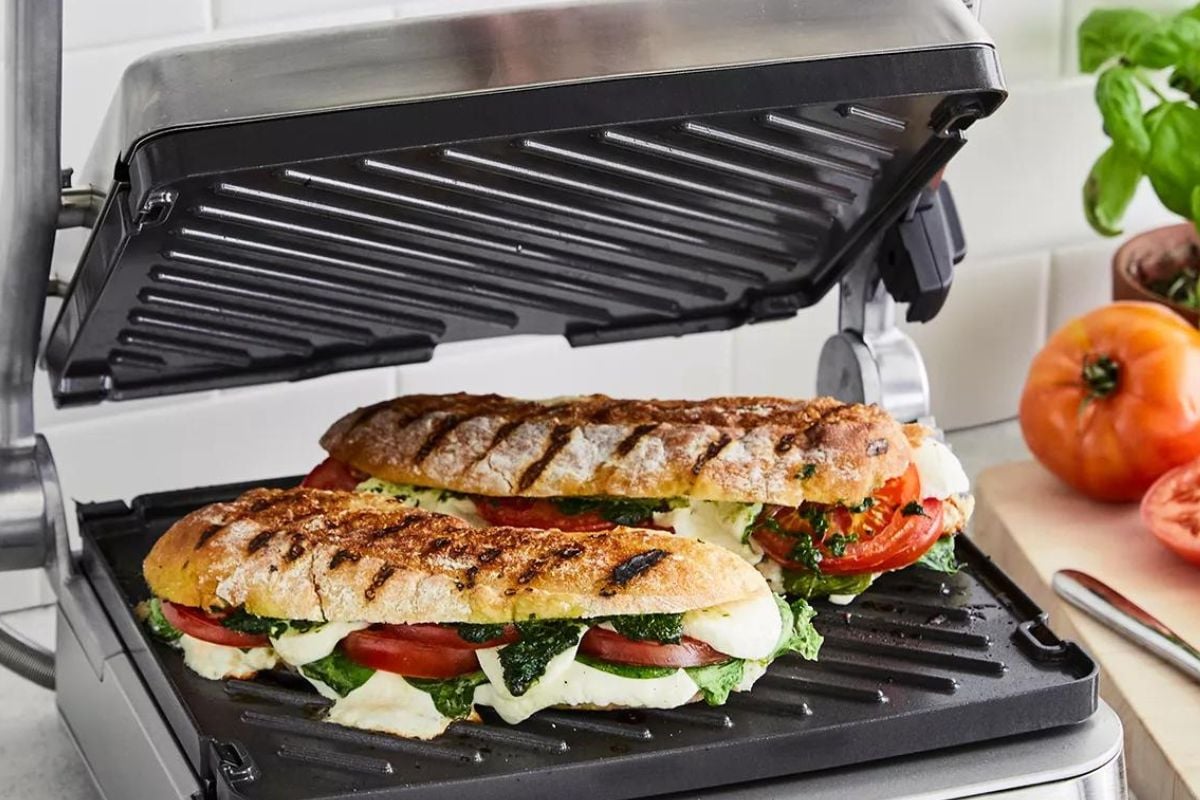
If you want an all-around great panini press that’s affordable and can handle many jobs, the Cuisinart Griddler Elite is for you. It’s the panini press you’ll find in Meggan’s kitchen because it does it all. She selected it over other panini presses when she purchased it in 2018 because of its 2-sided cooking plates that make it a great option for grilling indoors when you can’t fire up the grill outside.
“I chose it because the plates could be turned over, so you can have either smooth plates or plates with ridges (or one of each) depending on what you’re trying to do,” says Meggan. “It’s a versatile countertop appliance for paninis, grilled sandwiches like the Classic Reuben, kebabs, chicken, pancakes, burgers, whatever you want!”
Meggan also loves that the large 240-square-inch grilling surface can get up to 500 degrees (for up to 2 minutes) to sear food and lock in flavor, adding to its incredible versatility. In total, this griddle has 6 cooking options (contact grill, panini press, full grill, full griddle, half grill/half griddle, and top melt).
Its adjustable temperature controls for both the grill and griddle functions heat up different foods that may need different cooking times, ensuring a perfect grill. Just make your selections on the easy-to-use adjustable digital controls, lower the handlebar, and let it do the rest.
After using it, just empty the integrated drip tray and put the removable plates in the dishwasher. The adjustable cover and lock will keep it safe for storage.
The Specs:
- Measurements: 14.65 by 16.22 by 8.11 inches
- Material: Brushed stainless steel
- Watts: 1800
- Weight: 21 pounds
The Pros:
- Both ridged and smooth plates
- Removable plates are dishwasher safe
- Temperature controlled
- Distributes heat evenly
The Cons:
- May need to manually apply pressure
What Others Are Saying
The Cuisinart Griddler Elite has a 4.7-star rating on Amazon from more than 46,300 reviews.
Buy the Cuisinart Griddler Elite:
2. Easiest to Use: Hamilton Beach Electric Panini Press Sandwich Maker
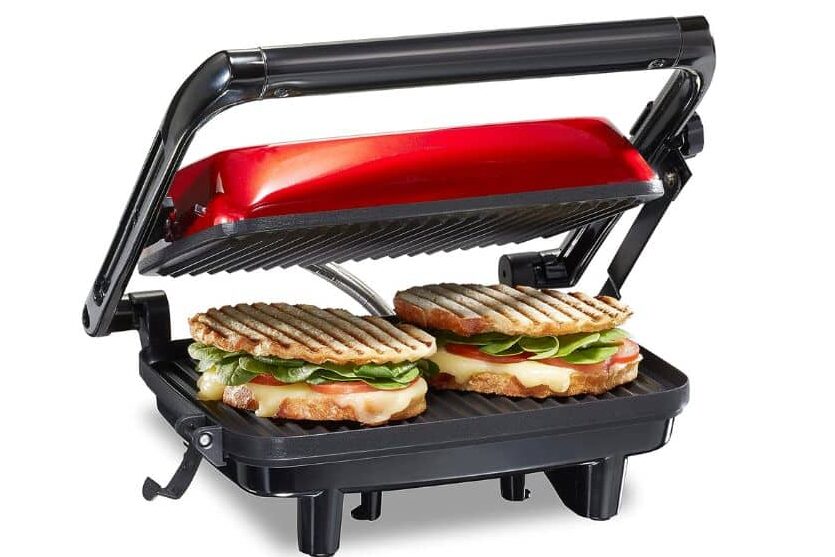
The Hamilton Beach Electric Panini Press Sandwich Maker offers affordability without compromising on quality. It can handle up to 3 sandwiches at a time, but its compact size makes it ideal for small kitchens or countertop spaces where storage is limited. One of our favorite design elements is the storage latch that locks it closed so you can store it upright and tuck it out of the way.
The plates also heat up quickly and evenly, ensuring an even cook. It’s equipped with a café-style floating lid, so this panini press accommodates sandwiches of all different thicknesses with ease. The locking lid feature ensures that your ingredients are pressed firmly on the cooking plates, resulting in evenly toasted bread and well-melted fillings. That makes it easy to make things like open-faced sandwiches, flatbreads, or even a quesadilla.
Because it heats up so quickly, cooks evenly, has nonstick plates, and the controls are intuitive, it’s one of the easiest panini presses to use.
The Specs:
- Measurements: 12.6 by 12.3 by 4.53 inches
- Material: Metal
- Watts: 1400
- Weight: 5.18 pounds
The Pros:
- Presses evenly
- Lightweight
- Features a convenient top lid lock
- Stores upright
The Cons:
- No drip tray
What Others Are Saying
The Hamilton Beach Electric Panini Press Sandwich Maker has a 4.5-star rating on Amazon from more than 17,800 reviews. Additionally, it was named the best less expensive panini press by The Strategist.
Buy the Hamilton Beach Electric Panini Press Sandwich Maker:
3. Best Splurge Panini Press: Breville Sear and Press Grill
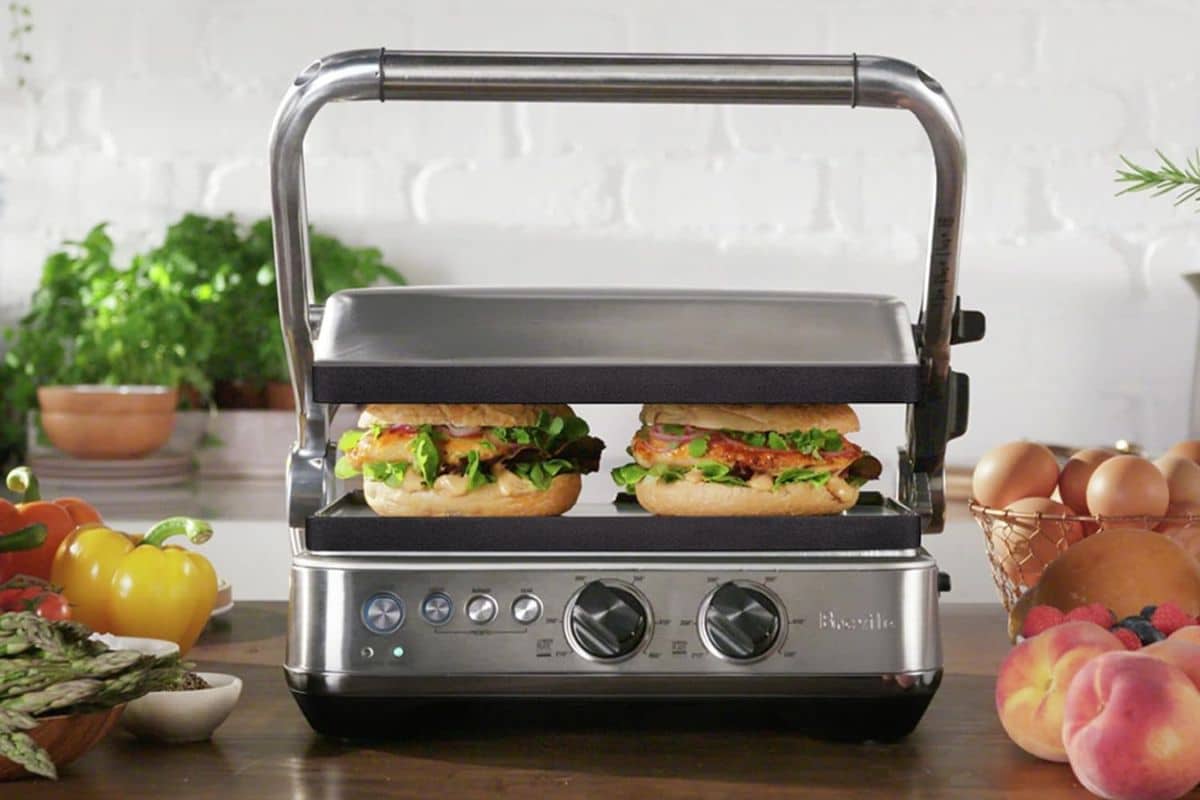
Breville is known for its high-quality kitchen appliances, and the Breville Sear and Press Grill panini press is no exception. True to the brand, it sports a sleek stainless steel exterior, which not only looks stylish with its streamlined design but also makes it durable and easy to clean.
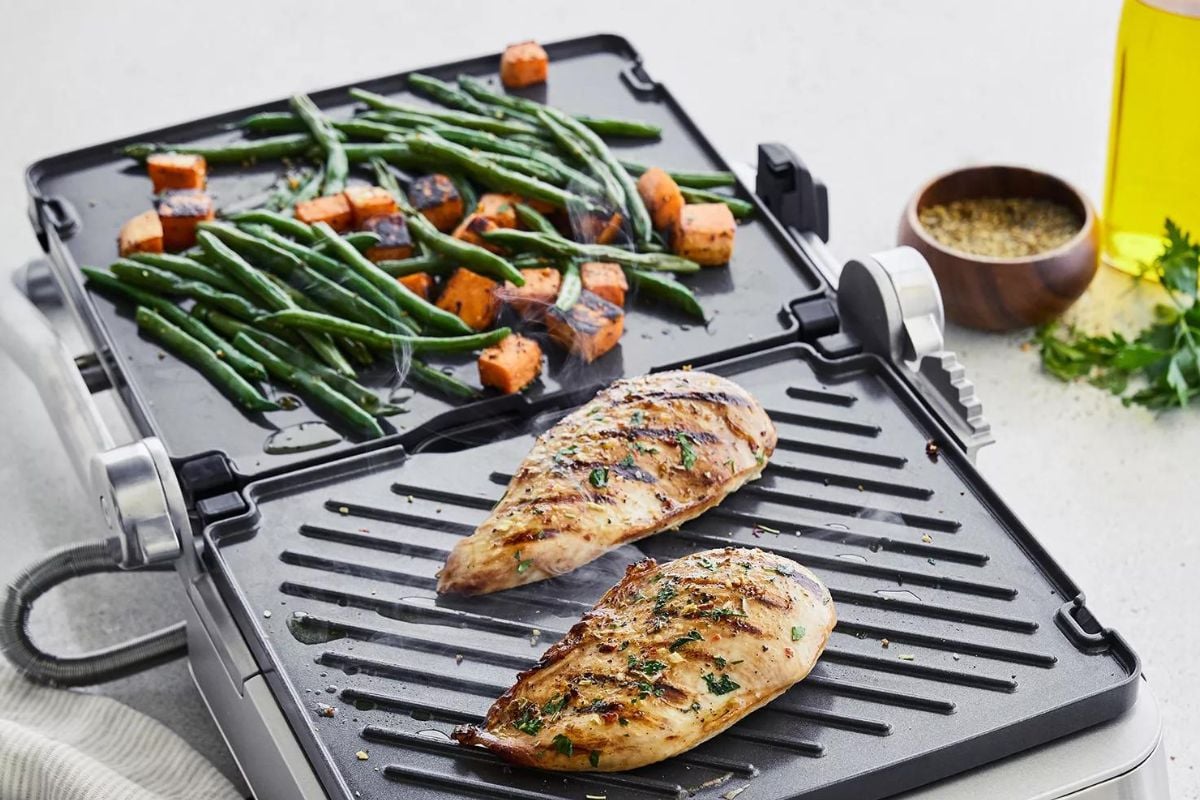
Perhaps the best thing about this model is its versatility. This press is equipped to make paninis, burgers, steaks, waffles, grilled sandwiches, wraps, and even grilled vegetables with its 180-degree floating hinge design that lets you completely open it up for side-by-side grilling. When you want to make a traditional panini or sandwich, you can swing it shut to your preferred height to accommodate the thickness of whatever you’re making.
The 240-square-inch nonstick cooking plates are large enough to cook 2 filling-packed panini sandwiches with ease. Plus, you can decide whether you want to use the side of the plates with the grill ridges or the side without. The control panel looks fancy because you can choose settings like panini, burger, and sear with dual-temperature knobs to control both the bottom and top heat, but it’s incredibly intuitive to use.
The Specs:
- Measurements: 14.75 by 13.75 by 8.5 inches
- Material: Brushed stainless steel
- Watts: 1800
- Weight: 15 pounds
The Pros:
- 180-degree floating hinge design
- Large cooking surface
- Intuitive control
- Adjustable top plate
The Cons:
- Expensive
What Others Are Saying
The Breville Sear and Press Grill was tested and named the best splurge panini press by Food & Wine and The Strategist.
Buy the Breville Sear and Press Grill:
4. Best Budget Panini Press: Chefman Panini Press Grill
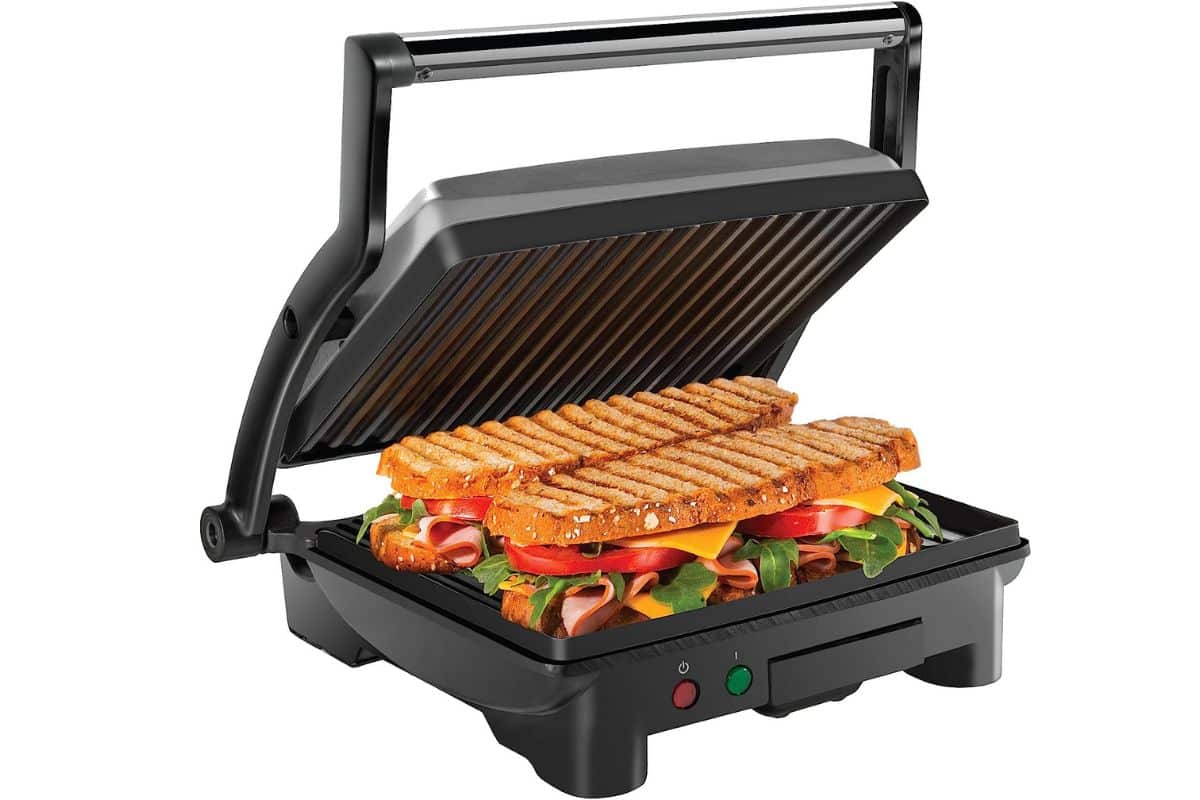
If you’re looking for a no-frills panini press that gets the job done, the Chefman Panini Press Grill is a great budget option. What you see is what you get with this model: a non-stick griddle with two ridged surfaces, a hinged float that allows it to open 180 degrees, and a removable drip tray that makes cleanup easy. However, it doesn’t have temperature control, presets, timers, or alarms, just a power switch and indicator lights to show when it’s heating and when it’s at temperature. This means you’ll have to monitor the progress of your food as it cooks, but once you figure out the timing, you’ll still be pleased with the perfectly crispy bread it produces.
It’s quite compact, but this newer model has an upgraded handle to help you close the lid down on your sandwiches, so you can apply pressure to the handle to cook a thick Cubano. While it’s not big enough to feed a crowd, it can accommodate 2 large sandwiches at once, so it’s a great value buy even if you have a smaller kitchen or want to use it in a dorm or office.
The Specs:
- Measurements: 12 by 13.5 by 5.25 inches
- Material: Stainless steel
- Watts: 1,000
- Weight: 6.35 pounds
The Pros:
- Simple buttons and operation
- Opens up 180-degrees
- Compact to store
The Cons:
- No temperature control
What Others Are Saying
It has a 4.4-star rating from more than 13,800 reviews on Amazon. Additionally, Food & Wine called it the best floating hinge option.
Buy the Chefman Panini Press Grill:
Other Panini Presses to Consider
Staub 12-Inch Enameled Cast Iron Grill Pan and Press
If you have a big budget, this grill pan and panini press by Staub would be a great addition to anyone’s kitchen. We love that it’s made of enameled cast iron so paninis cook evenly under the weight of the press, it heats exceptionally well, and it is smaller to store than electric panini grills and sandwich makers. But with a price tag that high, we’ll pass. The Staub 12-Inch Enameled Cast Iron Grill Pan and Press is available at Williams Sonoma for $359.
George Foreman Electric Indoor Grill and Panini Press
Everyone associates the George Foreman name with great indoor grills. We like it because it is lightweight and portable, so you won’t break a sweat pulling it out of the cupboard. Its small size also makes it great for smaller households, but we’d prefer a model that can fit two sandwiches at once so food gets on the table for multiple people faster. The George Foreman Electric Indoor Grill and Panini Press is available at Amazon for $24.99.
Ovente Electric Panini Press Grill and Sandwich Maker
This panini press is very easy to use. When the light is green, the plates are hot enough to start to cook your panini. When the light turns red, the sandwich is done. But this convenience comes with one major downfall: Even though it mostly does a good job, you can’t adjust the temperature, so it can melt cheese too much. Once it oozes onto the plates and burns, you have quite the mess to scrape off. The Ovente Electric Panini Press Grill and Sandwich Maker is available at Amazon for $24.99.
Why You Can Trust Us
I’m Belle, an award-winning content creator and an adjunct professor who works in restaurant PR in the Midwest. For over 20 years, I’ve held almost every position imaginable in various restaurants, including ownership of a Korean-concept hot dog cart (that was named after my dog’s teeth). My writing and on-camera work are on the Better Homes & Gardens website.
To create this guide for the very best panini presses every kitchen should have, I worked with Meggan to hear which models she personally loves and to learn what qualities she would consider when picking out the best sandwich press that produces crispy, golden sandwiches every time. I then researched highly recommended models and read hundreds of online reviews to find the best options out there.
We then compared them side by side and rated them on performance, power, size, weight, and overall value to come up with our list of the best panini presses.
Everything You Need to Know About Panini Presses
What to Consider Before Buying a Panini Press
So, you’re in the market for a panini grill press? Before you settle on one specific panini press, make sure to consider these options before you add one to your cart:
- Type of Hinges: Panini presses with traditional hinges only allow you to open up so far, so the thickness of your sandwich is limited. Alternatively, a panini press with floating hinges lets you open the unit wider to fit thicker sandwiches, like chicken sandwiches or Cuban sandwiches on thicker bread.
- Type of Plates: The material is important when selecting a panini press. Nonstick plates offer easy food release and cleanup. If you have a large family, you should also consider the size of the plates to make sure they are big enough to cook multiple sandwiches at once.
- Versatility: Consider whether the panini press offers additional functionalities beyond grilling sandwiches. Some have interchangeable plates for grilling other foods. Others can open up and lie flat so you can use them as a griddle for omelets or pancakes.
- Heating Mechanism: Check for wattage and temperature control options to make sure you get consistent cooking results.
- Ease of Cleaning: Look for features that make cleaning up easy. Some plates are removable and some are even dishwasher safe. Drip trays make it easy to prevent excess grease and crumbs from getting all over your countertop.
- Additional Features: Consider additional features that you want, like floating hinges, so you can fit thicker sandwiches or programmable settings for customized cooking.
How to Use a Panini Press
Using a panini press is a straightforward process, but following these steps will ensure you achieve delicious, perfectly grilled sandwiches every time:
1. Preheat the Panini Press: Plug in the panini press and allow it to preheat according to the manufacturer’s instructions. Most panini presses require a few minutes to reach the optimal grilling temperature.
2. Prepare Your Ingredients: While the press is heating up, prepare your sandwich ingredients. Layer your desired fillings — such as meats, cheeses, vegetables, and condiments — between slices of bread or another type of bread-like wrap.
3. Lightly Oil the Cooking Surface (if necessary): Depending on the type of panini press you’re using, you may need to lightly oil the cooking surface to prevent sticking. Some presses have nonstick surfaces that don’t require much oil.
4. Place the Sandwich on the Press: Once the panini press is heated, carefully open it and place your assembled sandwich onto the bottom cooking plate. Arrange it evenly to ensure an even grill.
5. Close the Lid: Gently lower the top cooking plate (lid) onto the sandwich, applying slight pressure to compress the ingredients. The floating hinge or adjustable height feature of the press should accommodate sandwiches of various thicknesses.
6. Grill the Sandwich: Allow the sandwich to grill for the recommended time, typically 3 to 5 minutes, or until the bread becomes golden brown and crispy, and the cheese melts. Avoid opening the press frequently to check on the sandwich, as this can disrupt the cooking process and prolong grilling time.
7. Check for Doneness: After the recommended cooking time has elapsed, carefully open the press to check if the sandwich is grilled to your desired level of crispiness and meltedness.
8. Remove and Serve: Using a spatula or tongs, carefully remove the grilled sandwich from the panini press. Transfer it to a cutting board and allow it to cool for a minute or 2 before slicing it into halves or quarters. Serve hot and enjoy!
9. Clean the Panini Press: Once you’ve finished grilling your sandwiches, unplug the panini press and allow it to cool completely. Wipe down the cooking plates with a damp cloth or sponge to remove any food residue, and if applicable, empty and clean the drip tray. Always follow the manufacturer’s instructions for proper cleaning and maintenance.
What Can You Make in a Panini Press?
Panini presses are actually much more versatile than most people give them credit for. Sure, they’re named after the food item they’re most often used to cook: a panini. But despite the name, you can use a panini press for anything! Here are some ideas:
Panini Sandwiches: This is the obvious choice. You can make a wide range of panini sandwiches using different types of bread, cheeses, meats, vegetables, spreads, and condiments.
Grilled Cheese Sandwiches: Use your panini press to make perfectly grilled cheese sandwiches with crispy, golden-brown exteriors and gooey melted cheese inside.
Quesadillas: Fill tortillas with cheese, cooked chicken or beef, beans, vegetables, and spices to create tasty quesadillas. Press them in the panini press until the cheese is melted and the tortillas are crispy.
Burgers: Make juicy burgers by grilling them on the panini press. Pressing them helps cook them evenly and gives them attractive grill marks.
Pancakes or Waffles: Some panini presses come with interchangeable plates, including flat griddle plates. Use these plates to make pancakes or waffles for breakfast or brunch.

How to Clean a Panini Press
There are a few safety concerns to consider before you start cleaning your panini press.
- If you notice a burning electrical smell, switch the panini press off immediately and contact the retailer and/or manufacturer. Do not use the press again.
- Never leave the panini press unattended while turned on and in use.
- Make sure there is space between the back of the panini press and the wall.
Now that we’ve covered safety, here’s how you can effectively clean a panini press. Regular cleaning after each use will help keep your panini press in top condition and keep any gross mold from happening:
- Unplug the Panini Press: Before you start cleaning, make sure the panini press is completely unplugged and has cooled down to avoid any risk of burns.
- Remove Removable Parts (if applicable): If your panini press has removable plates, drip trays, or other detachable parts, take them out according to the manufacturer’s instructions. This makes cleaning much easier.
- Scrape off Food Residue: Use a soft spatula or scraper to gently remove any food residue or crumbs stuck to the grill plates. Be careful not to scratch the nonstick surface.
- Wipe with Damp Cloth or Sponge: Dampen a cloth or sponge with warm, soapy water and wipe down the grill plates and exterior of the panini press. Avoid getting water into any electrical components.
- Clean Non-Removable Plates: If your panini press has non-removable plates, use a damp cloth or sponge to wipe them down. Be cautious not to let excess water drip into the heating elements.
- Clean Drip Trays: If your panini press has a drip tray or grease catcher, remove it and clean it with warm, soapy water. Rinse thoroughly and dry before reassembling.
- Dry Thoroughly: After cleaning, use a dry cloth or paper towel to thoroughly dry all parts of the panini press to prevent rust and corrosion.
How Do You Make Paninis Without a Press?
A panini press is not a necessary kitchen gadget that most amateur cooks absolutely have to have. If you frequently make toasted sandwiches and prefer a light crisp in your food, then this grilling tool is a game-changer.
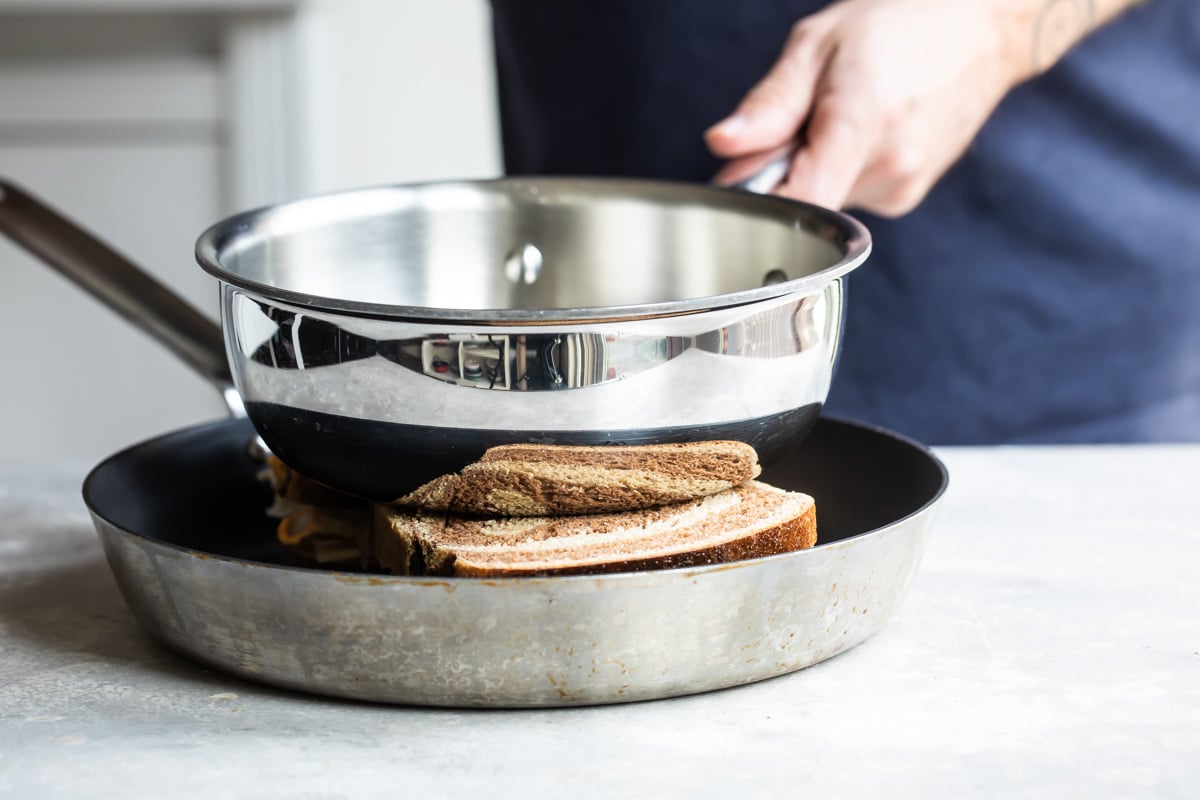
However, Meggan says if you’re determined to have the signature panini ridges without using a panini press, you’ll need an indoor griddle pan with the ridges. After you place your prepped sandwich on it, use a small heavy object (such as a spoon rest or a small pot lid) to press the sandwich down to create even browning.
The Best Recipes to Use Your Panini Press

If you’re not sure where to start with your new panini press, Meggan has a ton of ideas. While most cooks only whip out the panini maker in the event of an Italian sandwich, there’s so much more to a panini press than a mean grilled cheese. Try to use a panini press with these recipes, too:
- Reuben Sandwich
- Rachel Sandwich
- Caprese Sandwich: would be excellent grilled
- Tuna Salad: would make an epic tuna melt
Prices were accurate at time of publication.

Belle DuChene is an award-winning digital content producer who has a passion for all things lifestyle including food, fashion, and French culture. (And French wine, of course!) Over the course of 20 years, she's held almost every position imaginable in various restaurants and has eaten her way through the side streets of more than 20 countries. Always a student, her kitchen looks like a library of culinary school textbooks and she will sit for the level one sommelier exam with the Court of Master Sommeliers this summer. Belle owns an award-winning content creation agency, teaches communications at three colleges and universities, and tutors in French. In addition to Culinary Hill, her writing and on-camera demonstrations have been published on BHG.com.