This post may contain affiliate links. For more information, please see our affiliate policy.
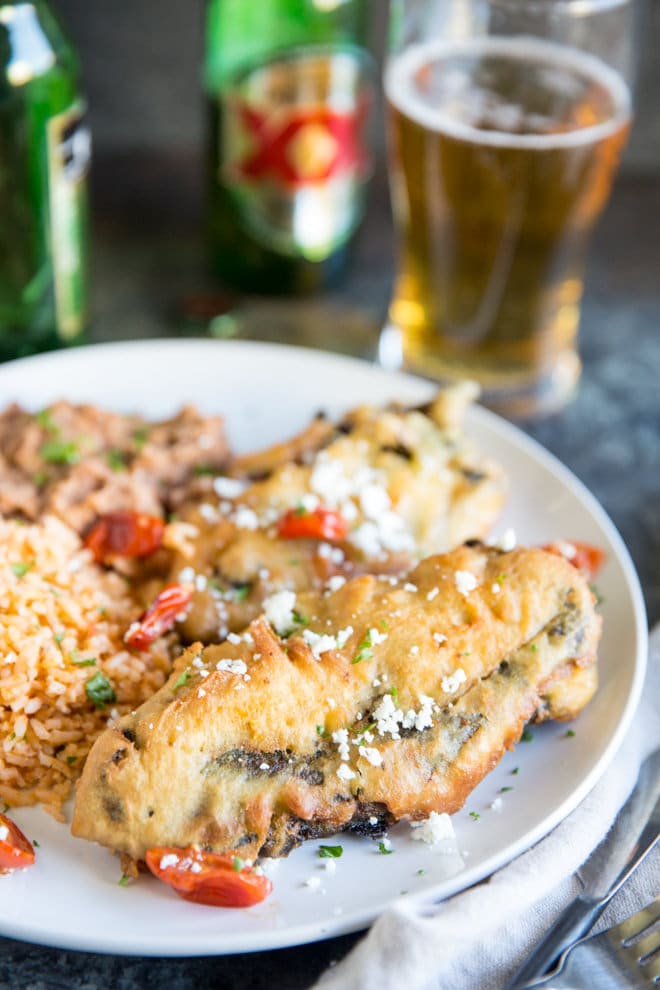
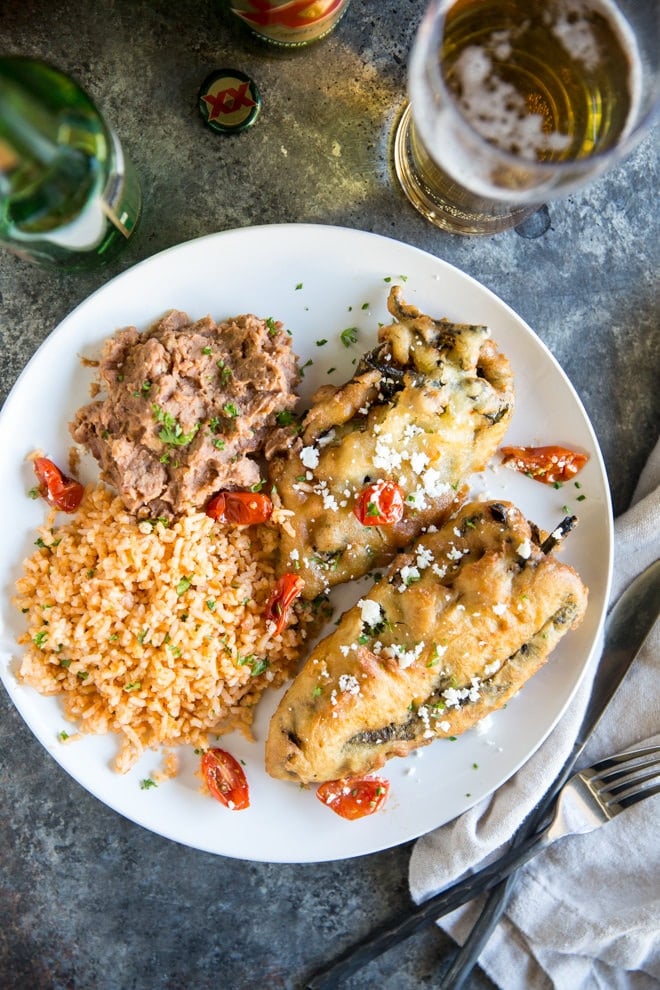
My favorite recipe for Chile Relleno features roasted Poblano chiles stuffed with two kinds of cheese, then beer-battered and fried to crispy-on-the-outside, gooey-on-the-inside perfection. It’s definitely worth the extra effort.
In 2004, I tried Chiles Rellenos for the very first time. Since that fateful day, I have never ordered anything else at a Mexican restaurant.
Without a fool-proof recipe and proper motivation, though, I never dared to attempt My Favorite Food at home. That is, until Sheila, a reader, generously shared one with me. She makes it every year for her husband’s birthday, the lucky guy!
I decided to use beer batter for my Chile Relleno recipe because I’m from Wisconsin and we beer-batter everything we can get our hands on. It just felt right.
Ingredient notes:
Beer: I use a lighter-bodied lager which has a lot of flavor, too.
Peppers: Traditionally, Chiles Rellenos is made with poblano peppers, which are dark green, glossy, and found in the produce section near the Bell peppers. However, they are also delicious made with fresh Pasilla chiles or Anaheim chiles. Whatever you can find works!
Monterey Jack cheese: Any melty cheese will work well, like queso asadero, Oaxacan cheese, or Chihuahua.
Step-by-step instructions:
For making the batter:
Make the beer batter by mixing together the flour, egg, oil, and salt in a bowl. Then pour in just enough beer to make a thick batter that clings to the spoon, about 6 to 8 ounces. Don’t over mix. Let the batter sit out at room temperature while you roast the peppers; it needs to rest about 30 minutes before it’s ready.
For roasting the chilies:
You have 3 basic ways, using the broiler, the oven, or open flame. I go a little more in-depth in how to roast peppers, but here are the basics.
Broiler: Move the oven rack 6 inches from the broiler and preheat to HIGH heat. Line a baking sheet with aluminum foil, and arrange the whole chiles in a single layer. Broil the chiles, watching closely, until the tops are blackened and blistered but not ashy white, about 5 minutes. Turn the chiles every few minutes until all sides are black and blistery.
Oven: Preheat the oven to 500 degrees. Line a baking sheet with aluminum foil, and arrange the whole chiles in a single layer. Bake for 30 to 40 minutes, until the skins are blackened and blistered but not ashy white, turning occasionally to cook every surface of the pepper.
Open flame: Turn a gas burner (or grill) to HIGH. Place chiles directly over the open flame. Using tongs, carefully turn the chiles until all sides are blackened and blistered but not ashy white. (This method sets off the smoke detector in my house.)
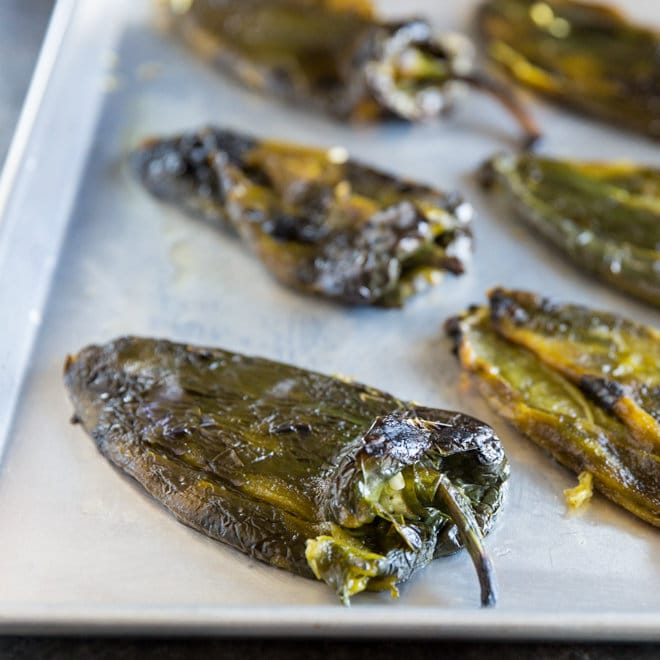
Once roasted, place the hot chilies in a bowl and seal with a tight layer of plastic wrap. This creates steam that helps loosen the skins. When they are cool, gently rub off the skin and make a single slit in each pepper to remove the seeds, leaving the stems attached.
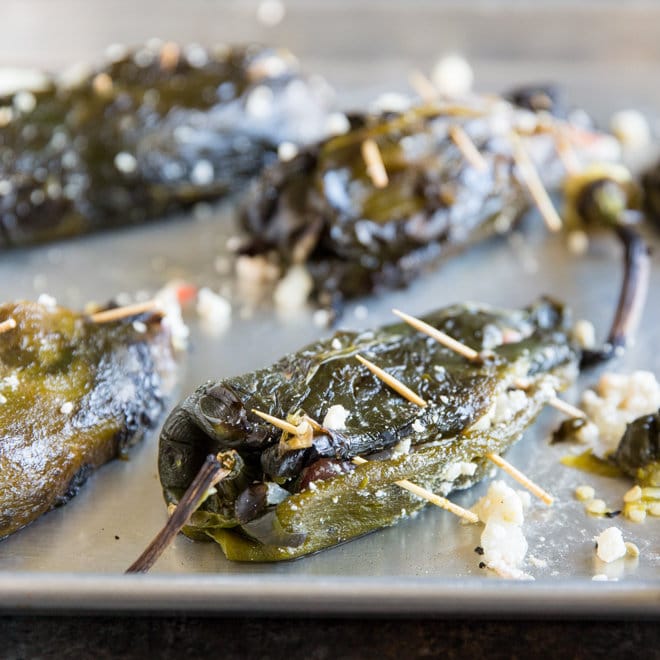
For making the cheese filling:
Mix together the cheese, tomatoes, and onion in a medium bowl. Stuff the mixture into each of the chiles, then use 2 to 3 wooden toothpicks to suture the opening shut and seal the cheese filling in. It works, I promise.
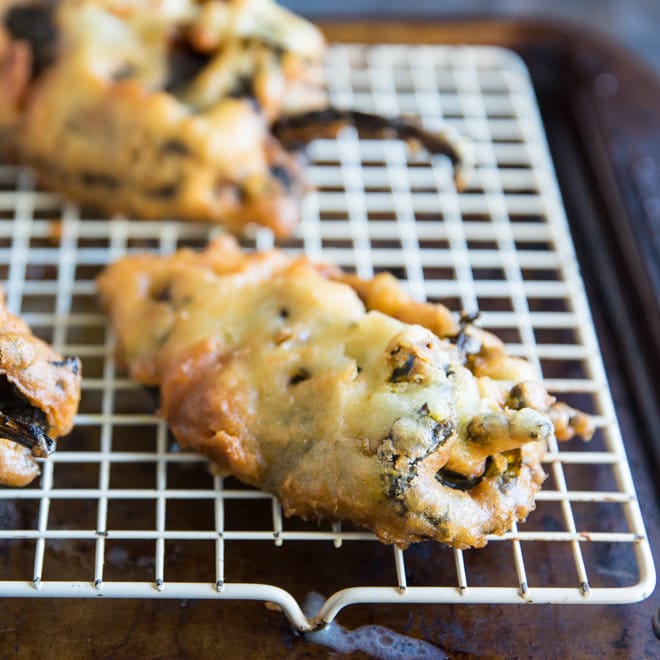
Frying the peppers:
Preheat the oven to 200 degrees, and place a wire rack over a rimmed baking sheet lined with foil. This will be a place to keep the fried battered peppers hot while you’re working in batches.
Pour 2 to 3 inches of oil into a large saucepan or Dutch oven, or fire up a deep fryer. Heat the oil to 360 degrees. A digital thermometer is crucial for getting the oil temp right.
Working with only one or (at most) two chiles at a time, dip the cheese-stuffed chiles in the beer batter, letting the excess batter drip back into the bowl. Carefully lower the battered pepper into the hot oil and cook, turning once, until golden brown, about 4 minutes.
Remove the peppers using a slotted spoon or wire skimmer, then place them on the wire rack in the oven to keep warm as you cook the others. Before serving, take out the toothpicks.
Recipe tips and variations:
Yield: One recipe makes 8 peppers.
Make ahead: If you have time, knock out the roasting of the peppers and store them in the fridge for later.
Storage: Eat right away, then store the leftover peppers in the refrigerator to eat the next time you’re hungry.
Leftovers: You can reheat in the microwave, but if you have time, use the oven to help crisp up the batter.
Pepper safety: Some peppers are hotter than others. If you’re sensitive to capsaicin, the chemical that makes peppers spicy, use disposable gloves and a paper towel to prepare the peppers. The paper towels have a grabby texture that really helps remove the blackened skin.
Roast a couple of extra peppers: If you lack confidence in your skills, roast some extra chiles so you have a little wiggle room in case one falls apart. And I promise it gets easier with practice.
Frying tips: Don’t overcrowd your pot, frying only a pepper or two at a time so the oil stays hot. Make sure the oil comes back to 360 degrees before adding the next batch. If the oil is too cool, the batter will soak up too much oil and be greasy. A good-quality digital thermometer comes in very handy for reading oil temperatures accurately.
Holding area: Create a warm place in the oven to transfer the fried peppers so they stay hot until you’re ready to serve them. Set the oven to 200 degrees, place a wire rack over a rimmed baking sheet in the oven, and add the finished peppers as they come out of the oil.
Just the cheese, please: If you love the pure, unadulterated texture of melted cheese, just leave the raw tomato and onion out of the filling.
Red sauce: Mexican restaurants usually smother Chiles Rellenos in a lake of red sauce. Sheila and I both agree this makes no sense, it just masks the delicious texture of the crispy batter.
Serve with: Serve the Chiles with super easy Mexican rice and pinto beans. And tortilla chips and salsa. Maybe some guac on the side.
Yeehah! More deliciously Tex-Mex recipes right here:
Join Us
Chile Relleno
Ingredients
- 1 cup all-purpose flour
- 3 egg whites beaten
- 3 egg yolk beaten
- 1/2 cup vegetable oil plus more for frying
- 1 teaspoon Salt
- 8 fresh poblano chiles or pasilla or anaheim chiles
- 8 ounces Monterey Jack cheese shredded
- 2 cups chicken broth
- 1 small Roma tomatoes quartered
- 1/2 small onion halved
- 1 clove garlic
- 1 tablespoon tomato paste
- Mexican rice for serving, optional
- Beans for serving, optional
Instructions
- To roast the chiles under the oven broiler, arrange an oven rack 6 inches from the broiler and preheat over HIGH heat. Line a baking sheet with aluminum foil, and arrange the whole chiles in a single layer. Broil the chiles until the tops are blackened and blistered but not ashy white, about 5 minutes. Turn the chiles every few minutes until all sides are blackened.
- To roast the chiles in the oven, preheat oven to 500 degrees. Line a baking sheet with aluminum foil for easy cleanup. Arrange the whole chiles in a single layer on baking sheet. Bake for 30 to 40 minutes, until the skins are blackened and blistered but not ashy white, turning occasionally to promote even roasting.
- To roast chiles over an open flame, turn a gas flame (or two) to HIGH. Arrange chiles directly over the flame. Using tongs, turn the chiles occasionally until all sides are blackened and blistered but not ashy white. This method sets off the smoke detector in my house.
- Transfer to a bowl and cover tightly with plastic wrap. Let stand until chiles are cool enough to handle, about 20 minutes.
- Leaving the stems on and chiles intact, carefully rub off and discard the blackened skin (I wear gloves and use paper towels). Using a small, sharp knife, cut a slit in one side and remove the seeds from each chile.
- In a medium bowl, add Monterey Jack cheese divide among the chiles. Using wooden toothpicks, close up the slits in the chiles. Set aside.
- Preheat oven to 200 degrees. Place a wire rack over a rimmed baking sheet lined with foil.
- Preheat deep fryer or pour 2 to 3 inches of oil into a large saucepan or Dutch oven. Heat to 360 degrees on a deep-frying thermometer.
- Working with 1 or 2 chiles at a time, dip the stuffed chiles in the beer batter, letting the excess batter drip back in to the bowl. Place in hot oil and deep fry, turning once (I use two spatulas), until golden brown, about 4 minutes.
- Using a slotted spoon or wire skimmer, transfer chiles to the wire rack in the oven to keep warm. Repeat with remaining chiles. Serve with rice and beans if desired.
- To make the sauce, In a blender add the chicken broth, tomato, onion, garlic, tomato paste, salt, and pepper, blended well. Strain the liquid into a clean large dutch oven. Bring broth to a boil and add the stuffed peppers to the broth to warm up about 6 minutes
Notes
- In a stand mixer, whip the egg whites to a soft peak about 2 to 3 minutes, adding the egg yolks one at a time to incorporate, set aside.
- Making a small cut on the side of the paper. Fill the pappers with the cheese, set aside.
- In a large skillet over medium high heat add oil, heat until 350 degrees about 5.
- In a medium sized bowl add flour, dredge the peppers in the flour, then eggs. Working one at a time. Transfer the pappers to the skillet. Fry until golden brown about 2 to 3 minutes each side. Set aside when finishing.
- In a blender add
Nutrition
Meggan Hill is a classically-trained chef and professional writer. Her meticulously-tested recipes and detailed tutorials bring confidence and success to home cooks everywhere. Meggan has been featured on NPR, HuffPost, FoxNews, LA Times, and more.
I’d like to make this beer battered recipe. I don’t see beer ever mentioned in my printout recipe. Know, in NM we use green chile peppers, not poblanos)
Hi, thanks for trying, I’m on a quest for this. I will keep you posted…
Thank you very much, looking forward to any help. If I by chance recover it I will share it with you. It is a refreshing change. Ty, T.
Hi TJ, my friends in Mexico think it might be Chile Rellenos with Nogada sauce. This a thick, cream sauce made with lots of dairy and ground up walnuts. To me, that doesn’t sound like what you described. What do you think? Imagine something with milk, cream, and cheese. You specifically said not a cream sauce… so I’m thinking this isn’t it. But I wanted to run it by you. Just do a google search for “chiles en nogada” or something like that and take a look. I’d love to know what you think and get any feedback (even though I’m already fairly certain you’re going to give me a thumb’s down). Let me know! Thanks! -Meggan
Hi am looking for a white or clear sauce for the Relleno’s. Not a Mexican cream sauce. I have had it before the cause was lost when my mom in law passed. I know she used chicken broth & flower chopped tomatoes, green onions pluses spices. Sound familiar??? I would love any help you could offer… thank you, TJ.
Hi TJ, I’m not sure off the top of my head. I order Chile Relleno whenever I can, but it’s always served with “Ranchero sauce” which is red in color. But let me ask my friends in Mexico, do some research, and see what I can figure out. I’ll reply back ASAP! Thank you! -Meggan
Could you please give the original coating recipe
Sure Carol! Here’s what Sheila said: “After stuffing, I coat the chiles lightly in flour. I take eggs (1 egg per 2 chiles) and whip them into a meringue, once it is nice and firm I add the yolks and fold them in. This makes it more like a batter easy for dipping, but it breaks down the whites so I try to move quickly. Dip the chiles in the egg mixture and fry until golden.” I definitely want to try this myself, too! Good luck and thanks.
Could you also give the original coating?
I will definitely try it with your beer batter idea!!! Definitely easier than what we go through!! 🙂 Thanks for sharing Meggan!!
Yummy this looks good! I love a beer batter, so light and fluffy! This definitely looks worth the effort!
If this doesn’t fall under the category of, “As good as it gets”, then nothing does. Talk about the best of both worlds – beer batter and Mexican – WOW! Great idea!